Xnat
Launching your own test XNAT instance
In order to test out all the features of XNAT-utils and the container service in a safe way, we will first run our very own copy of XNAT on the CVL (i.e. instead of connecting to your institutional repository, e.g. https://xnat.sydney.edu.au).
To do this, open a terminal on your CVL instance (either from the desktop or directly from RONIN link) and type the following line to launch a test XNAT instance on your CVL machine.
ubuntu@ip-10-0-5-248:~ $ xnat4tests start --with-data dummydicom
/usr/lib/python3/dist-packages/requests/__init__.py:89: RequestsDependencyWarning: urllib3 (1.26.15) or chardet (3.0.4) doesn't match a supported version!
  warnings.warn("urllib3 ({}) or chardet ({}) doesn't match a supported "
2023-03-28 16:24:25,610 - xnat4tests - INFO - Building xnat4tests in '/home/ubuntu/.xnat4tests/build' directory
2023-03-28 16:25:48,762 - xnat4tests - INFO - Built xnat4tests successfully
2023-03-28 16:25:48,764 - xnat4tests - INFO - Did not find xnat4tests container, relaunching
2023-03-28 16:25:49,425 - xnat4tests - INFO - xnat4tests launched successfully
2023-03-28 16:25:49,425 - xnat4tests - INFO - Attempting to connect to http://localhost:8080
2023-03-28 16:25:49,425 - xnat4tests - INFO - Connecting to http://localhost:8080 as 'admin'
2023-03-28 16:25:54,432 - xnat4tests - INFO - Connecting to http://localhost:8080 as 'admin'
2023-03-28 16:25:59,437 - xnat4tests - INFO - Connecting to http://localhost:8080 as 'admin'
2023-03-28 16:28:14,459 - xnat4tests - INFO - Connected to http://localhost:8080 successfully
2023-03-28 16:28:14,512 - xnat4tests - INFO - Configuing docker server for container service
The launched XNAT instance will be available on the 8080 port of the CVL host, i.e. http://localhost:8080 from the firefox browser on the CVL desktop.
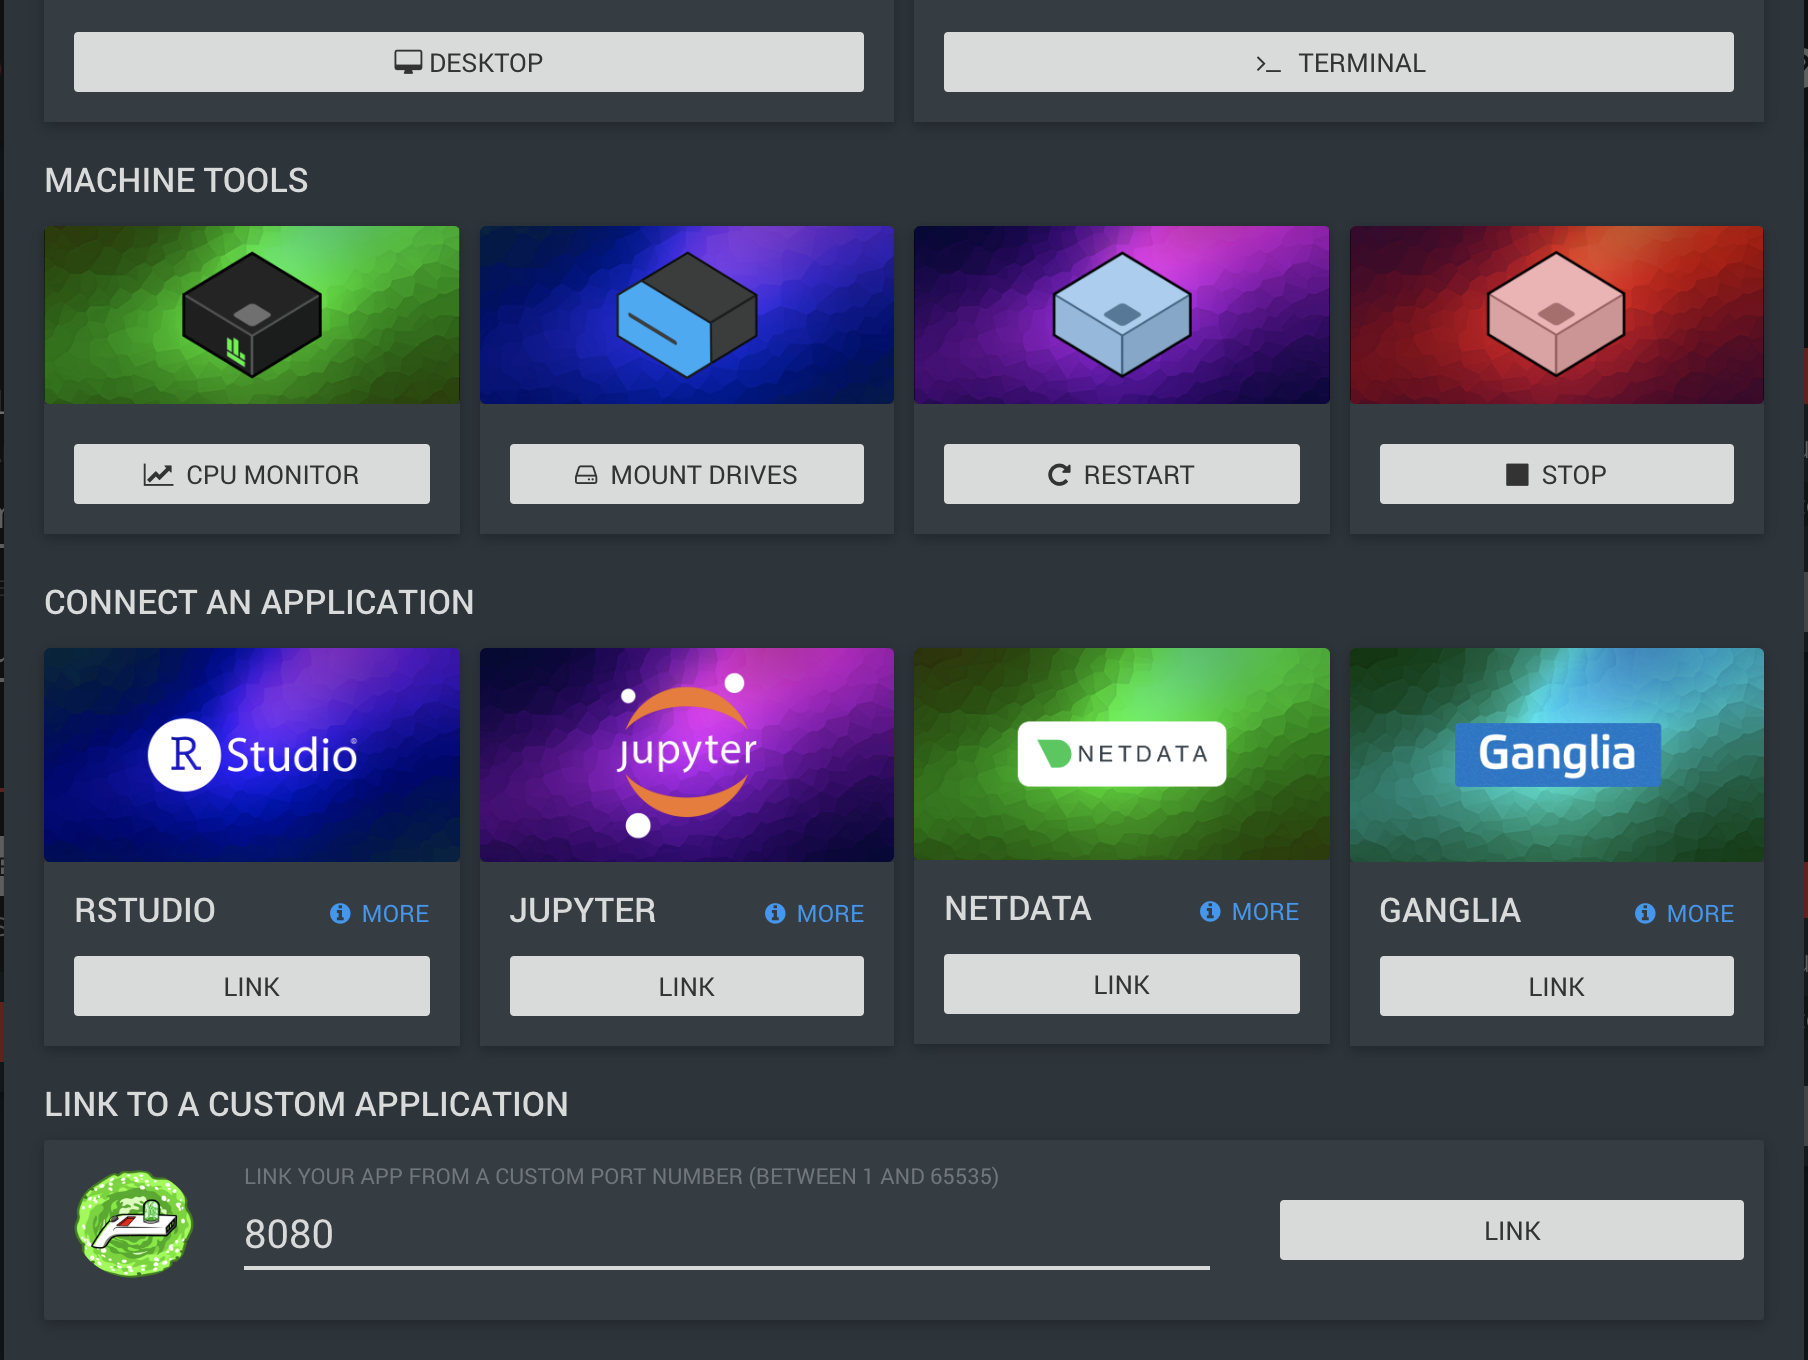
Accessing the test XNAT instance directly via RONIN link
RONIN link provides a neat feature to connect directly to the port on your CVL instance, so you can use the native browser of your machine to access your test XNAT instance.
Select CONNECT TO MACHINE from RONIN link under your instance and then enter the 8080
port number under LINK TO A CUSTOM APPLICATION and press LINK.
This should map 8080 on the CVL desktop to 8080 on your local machine, so it can
be accessed from your browser at http://localhost:8080.
Using XNAT
Logging into XNAT (AIS)
Enter your credentials into the XNAT prompt
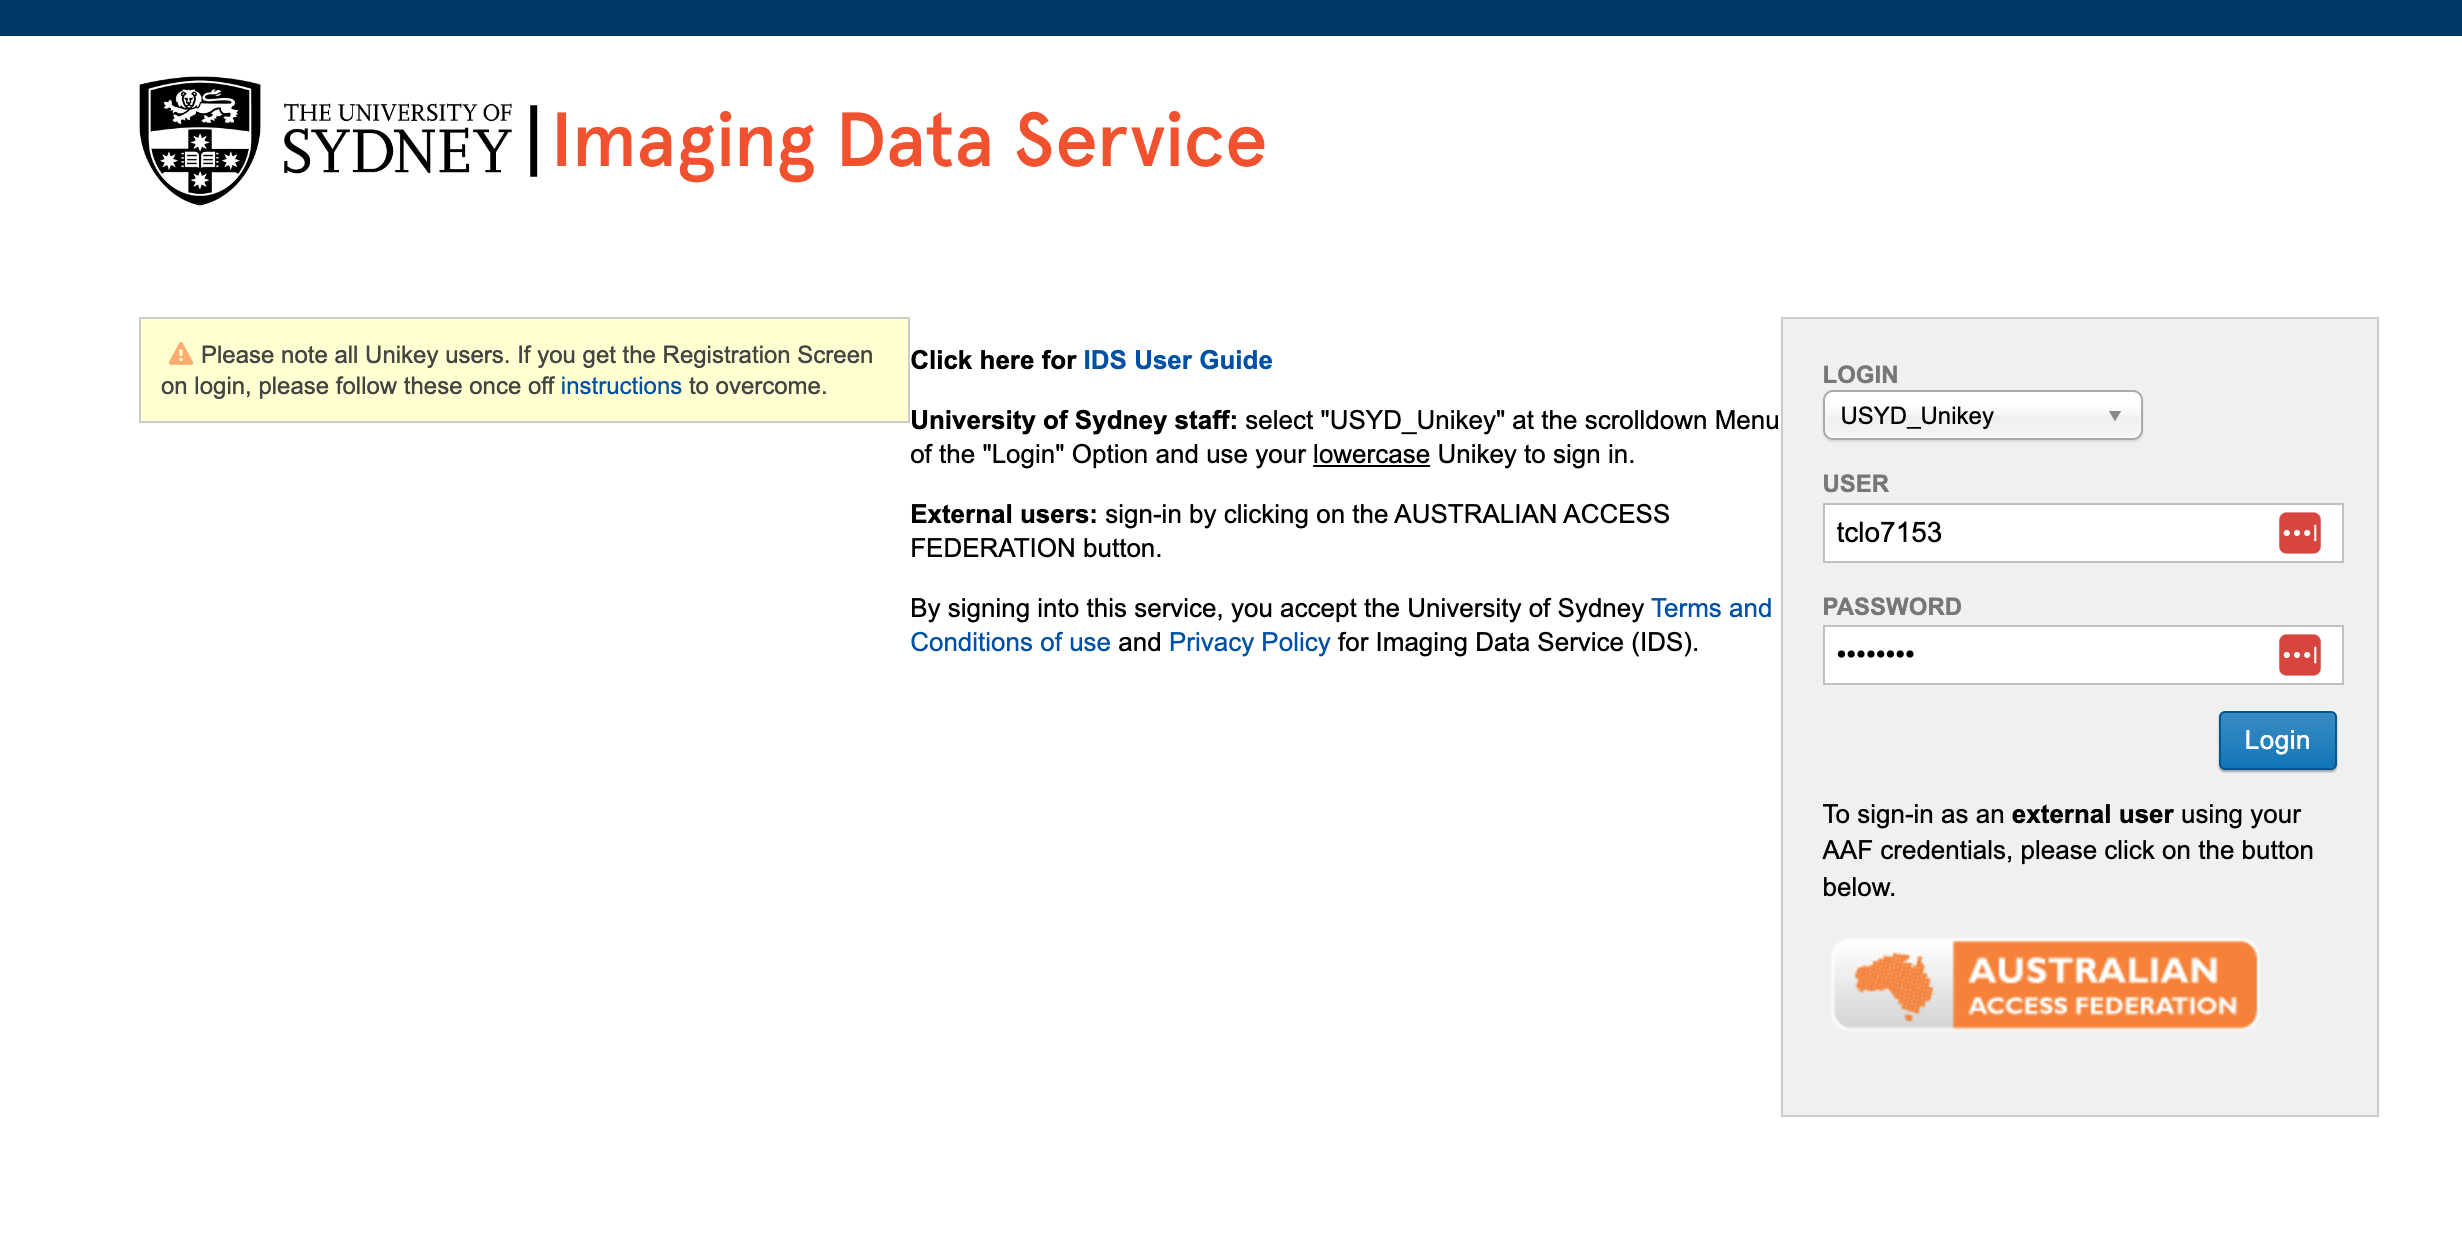
When using an AIS XNAT, make sure you either select the correct authentication method from the drop down box (i.e. unikey for University of Sydney staff/students), or click on the orange AAF button to login using credentials from another institution.
For the text XNAT instance the username and password are both “admin”.
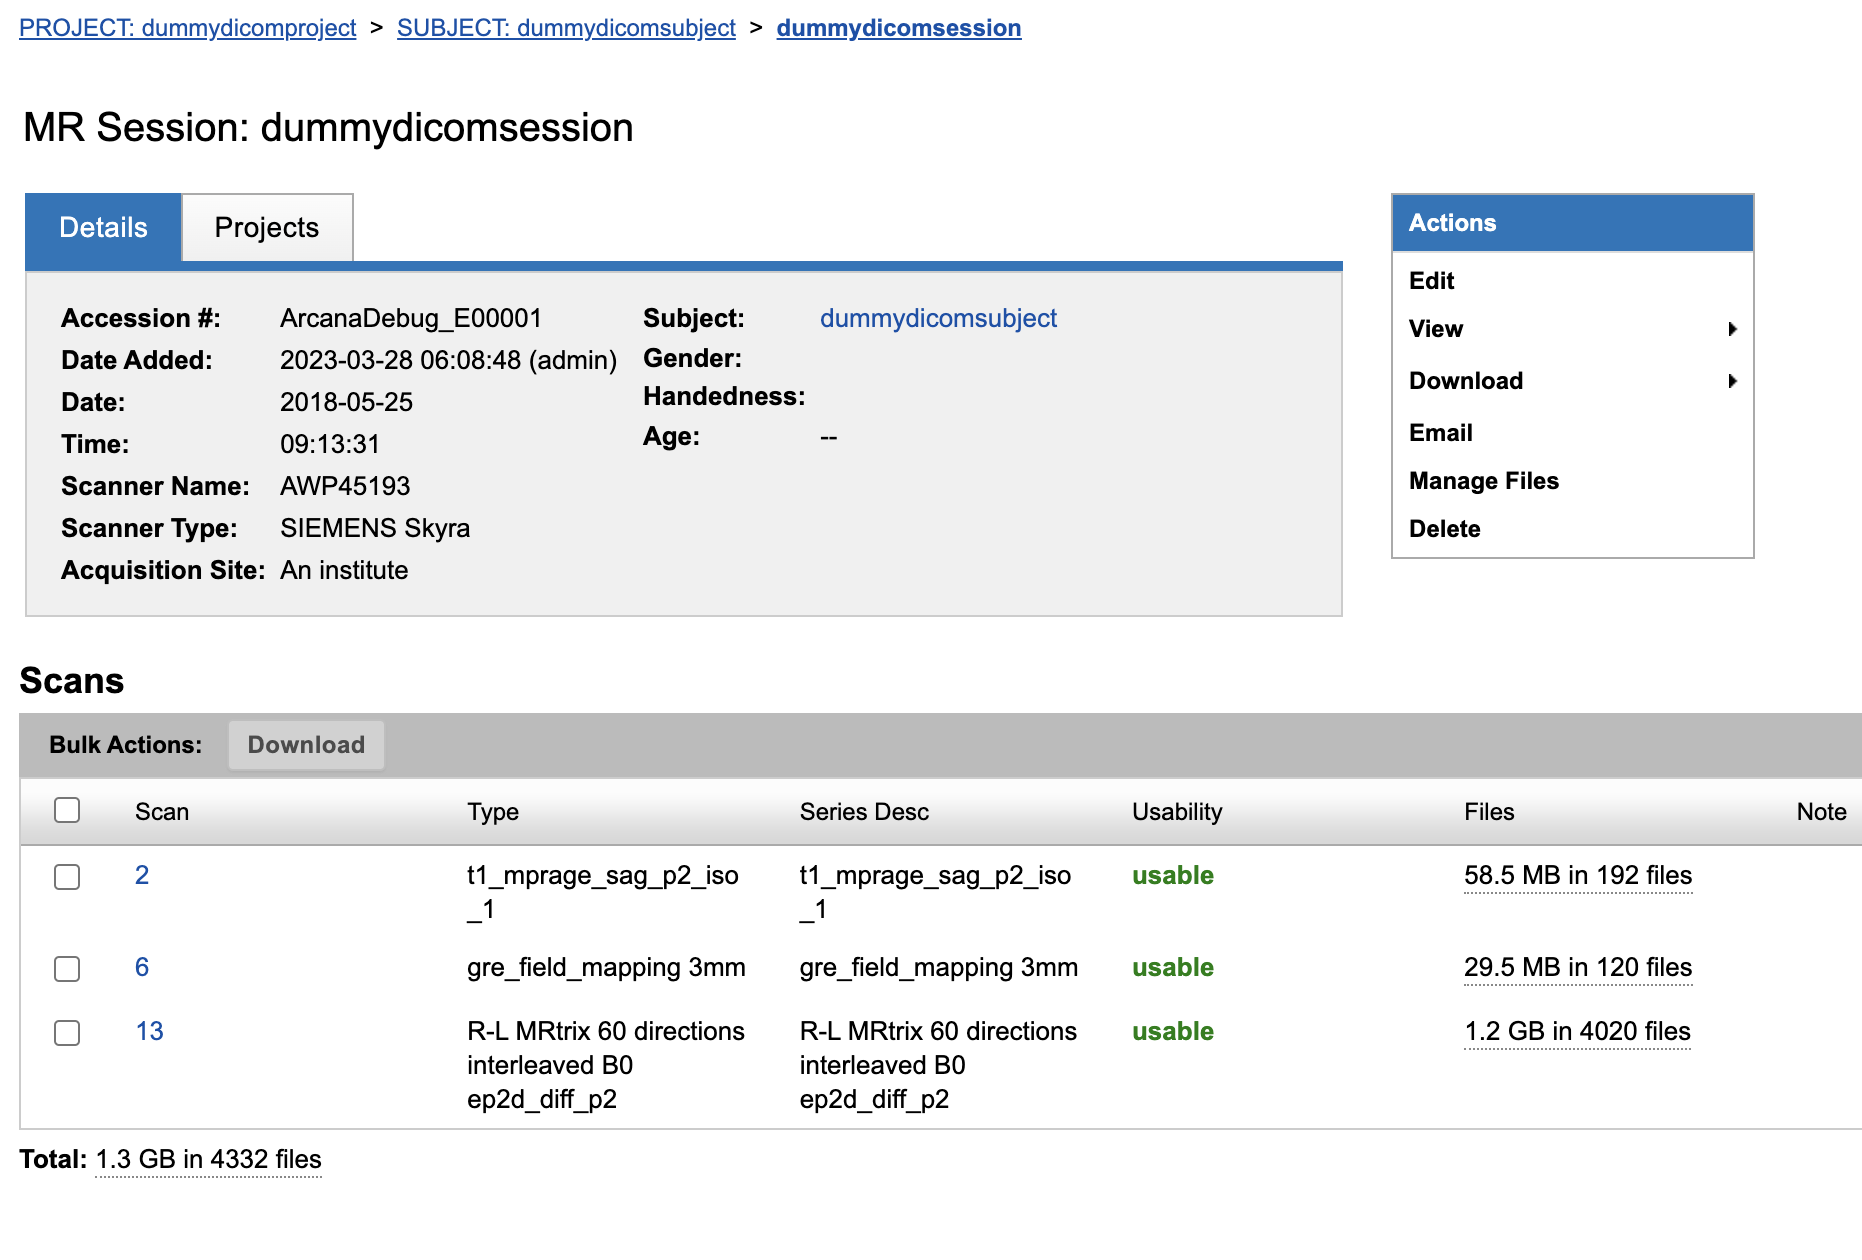
Navigating to session page
To navigate to an imaging session page, either select the projects on the left-hand side or the recent sessions on the right.
Alternatively, you can search using the quick search bar, or create an advanced search to select a range of sessions.
Downloading data
There are three ways to download data from an XNAT session page, via the “bulk action”, the “download diaglogue” or the “file manager”
Bulk action
Simply check the checkbox next to the scans you want to download and click the Download button above the list of scans.
File manager
The file manager lets you view all the files that are stored within a session, and is accessed via the “manage files” action item. Under each scan you can see that there can be multiple resources (e.g. DICOM, NIFTI, SNAPSHOTS). Here you can select exactly which ones that you want to download.
Here you can download individual files by clicking on the links, or multiple files by
selecting the scans you want and clicking download. It is also possible to upload
individual files to parts of the file tree, although this isn’t used much in practice.
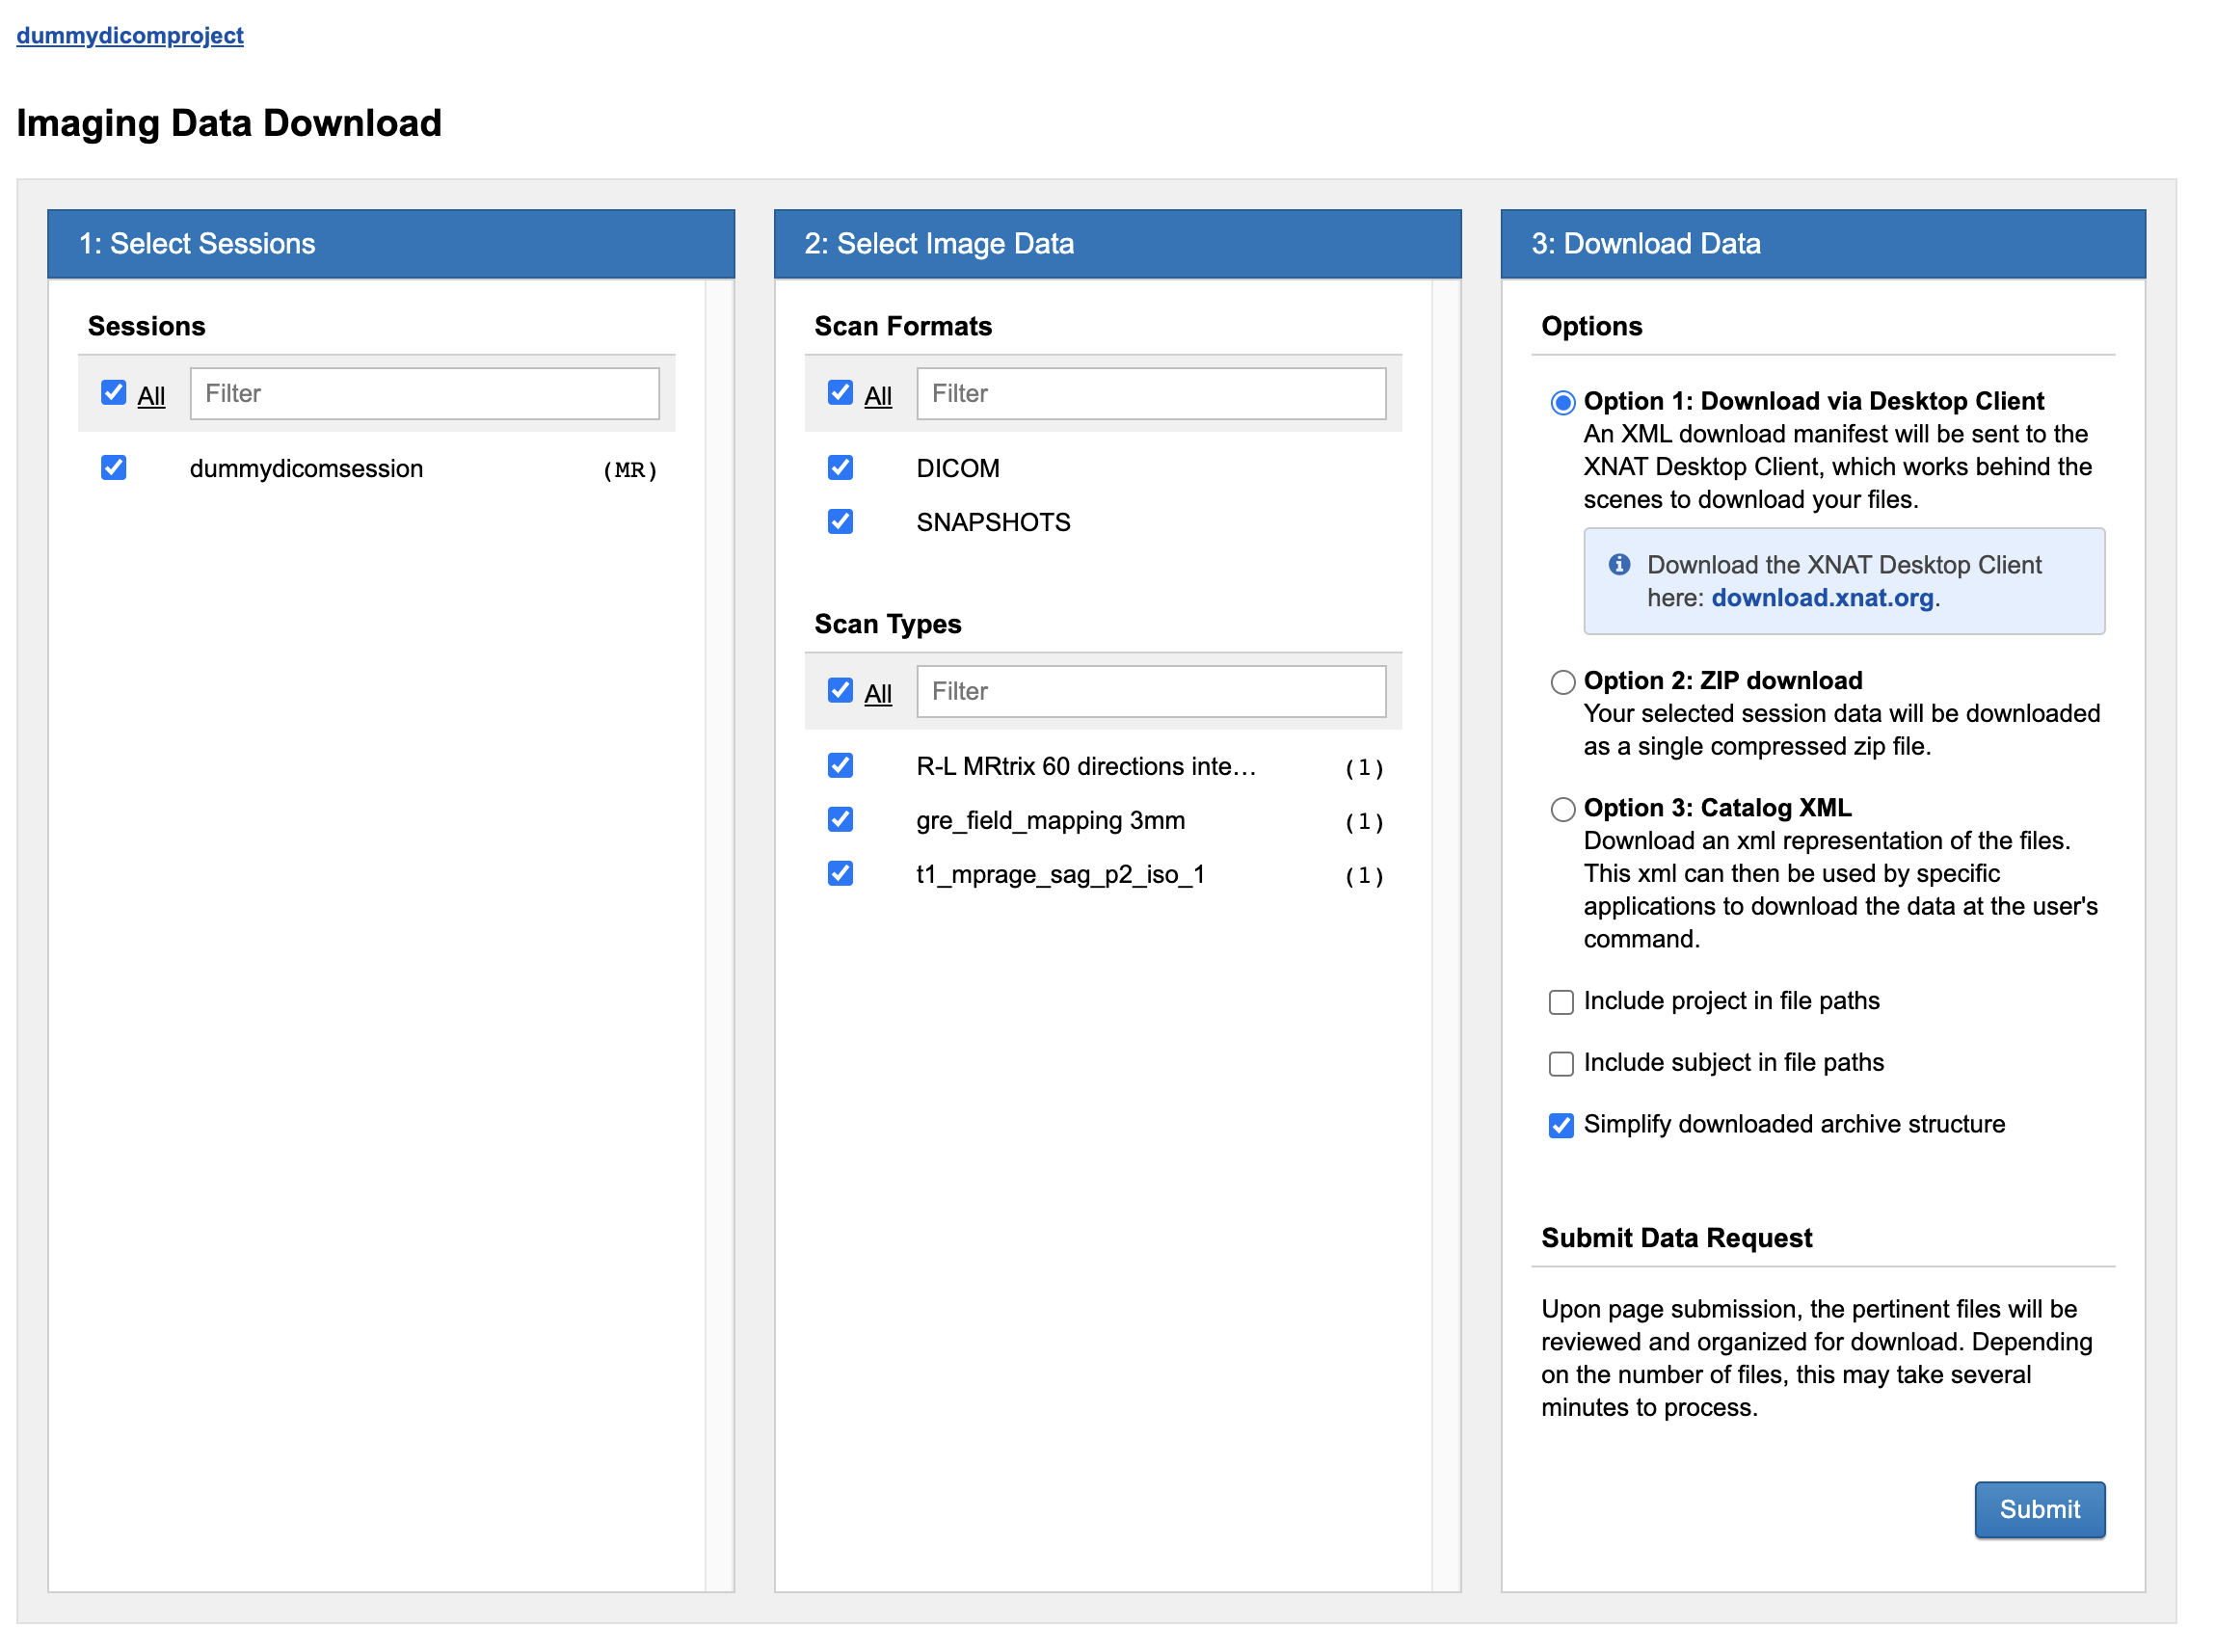
Download dialogue
Select Download > Download Images from the action item to bring up the download dialogue.
Here you can select the resources you would like to download across multiple scans,
and if accessing the dialogue via the project-wide action menu, the multiple sessions
as well.
There are 3 options you can use to download the data with
- Desktop Client - a Java client you can install on your own machine
- Zip download - bundles up the files into a zip and downloads them to your local computer (don’t use for large datasets)
- Catalog XML - data isn’t actually downloaded but all selected are collated into a XML manifest, which can then be used to download to remote machines