Xnat Container Service
Installing new pipeline images
While this is something typically done by site-administrators, we will go through the process here to install one on our test XNAT instances, and to demonstrate it is quite a simple process (as long as the container service is setup and has sufficient resources to handle your pipeline and it doesn’t need to be vetted for security).
Pull image to server
The first step is to pull a copy of the pipeline “image” to the container service. To do this select Plugin Settings from the
administration menu
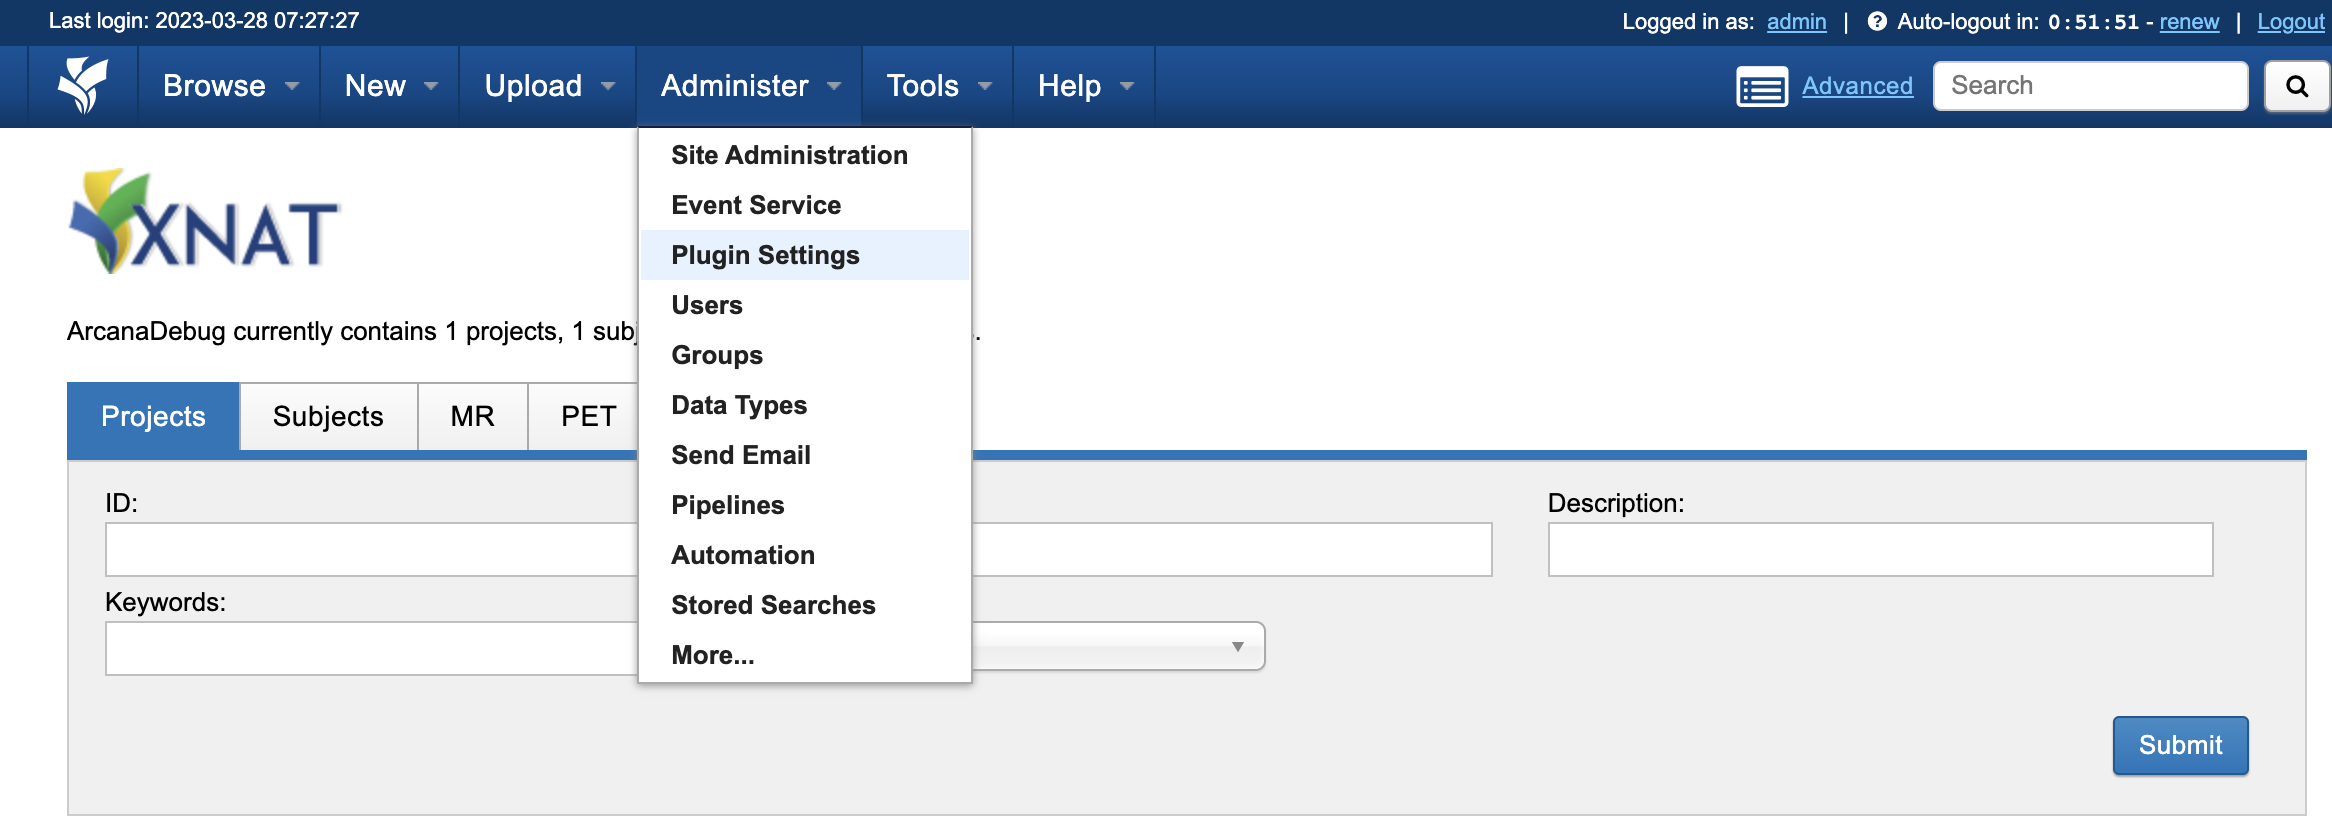
Then navigate to the Images & Commands tab and select New Image

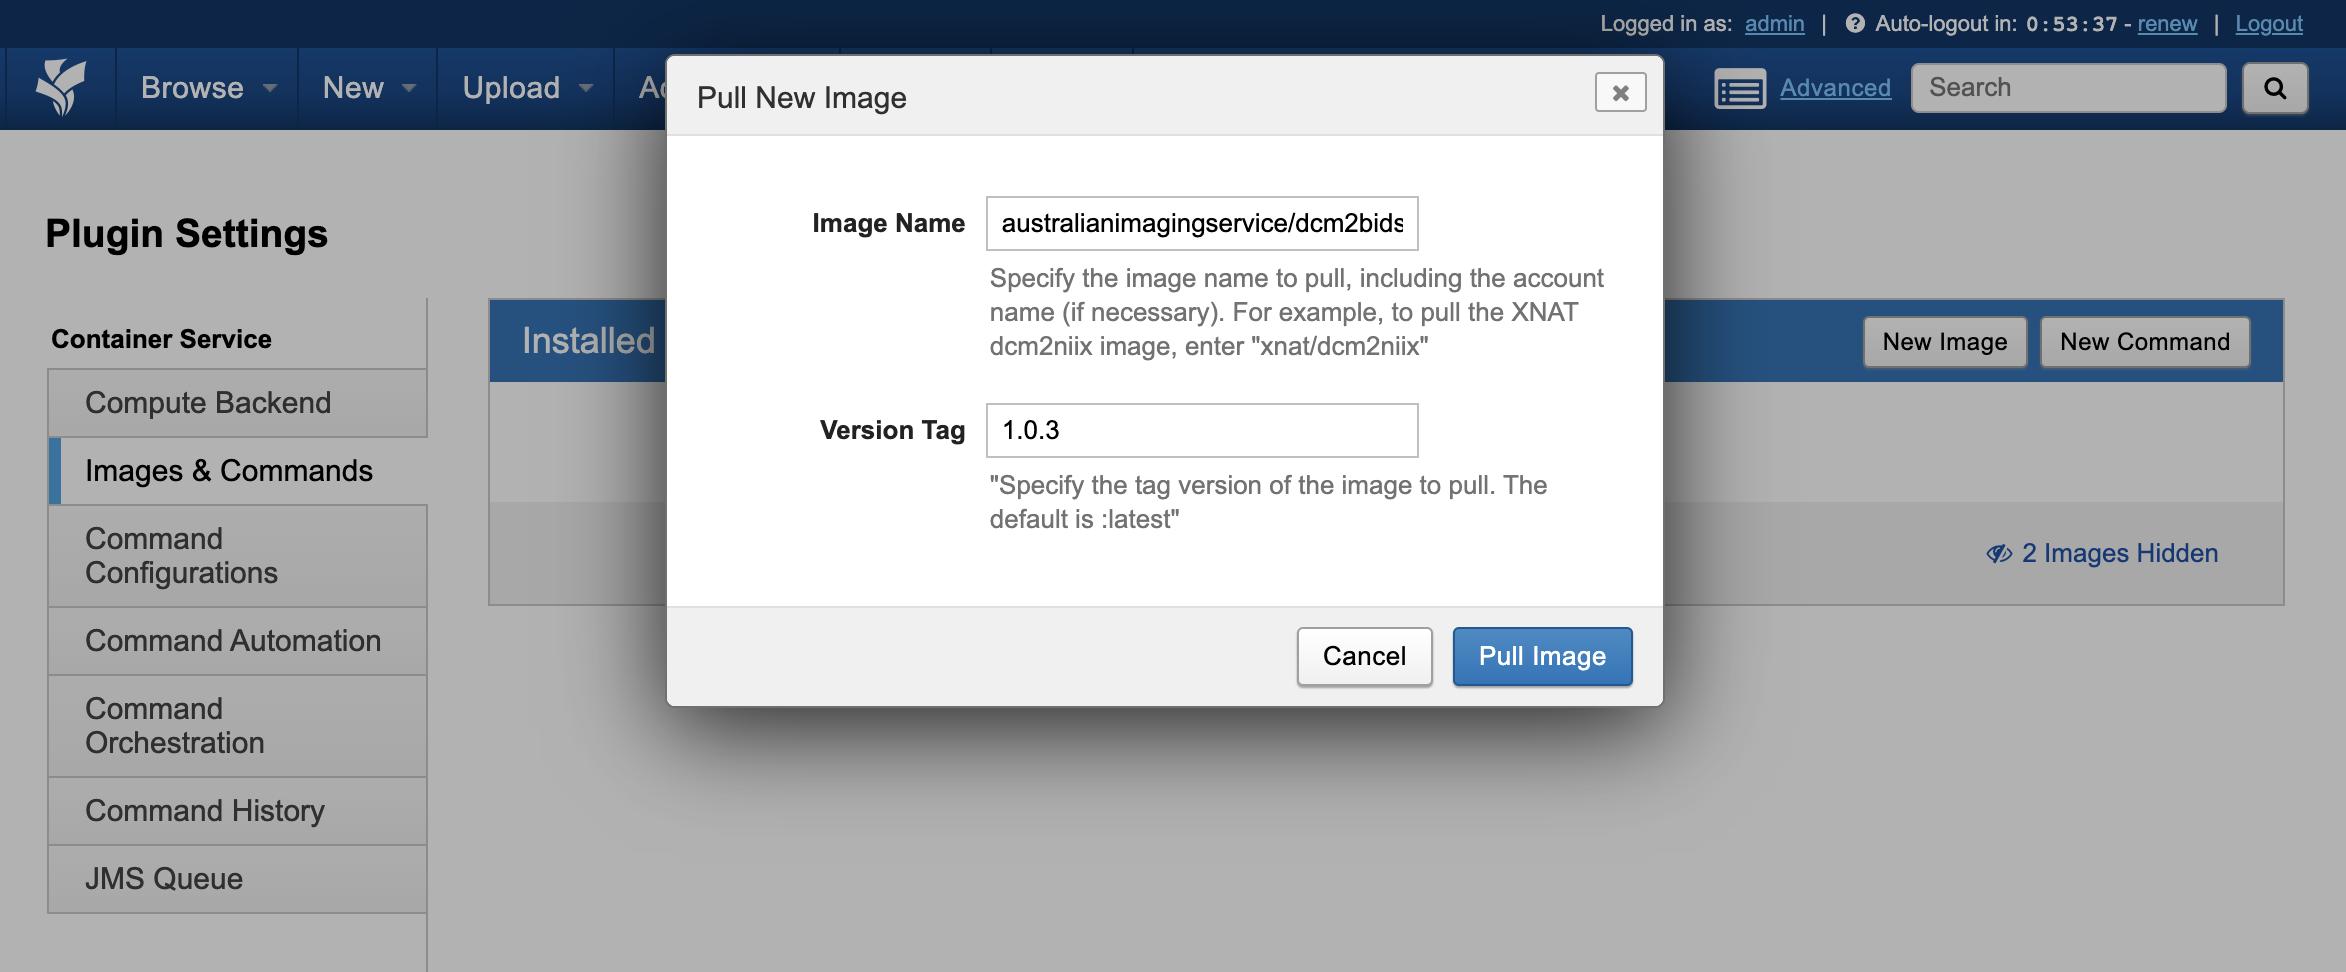
Copy australianimagingservice/dcm2bids-session into the Image Name field and 1.0.3 into the Version Tag field and click Pull Image.
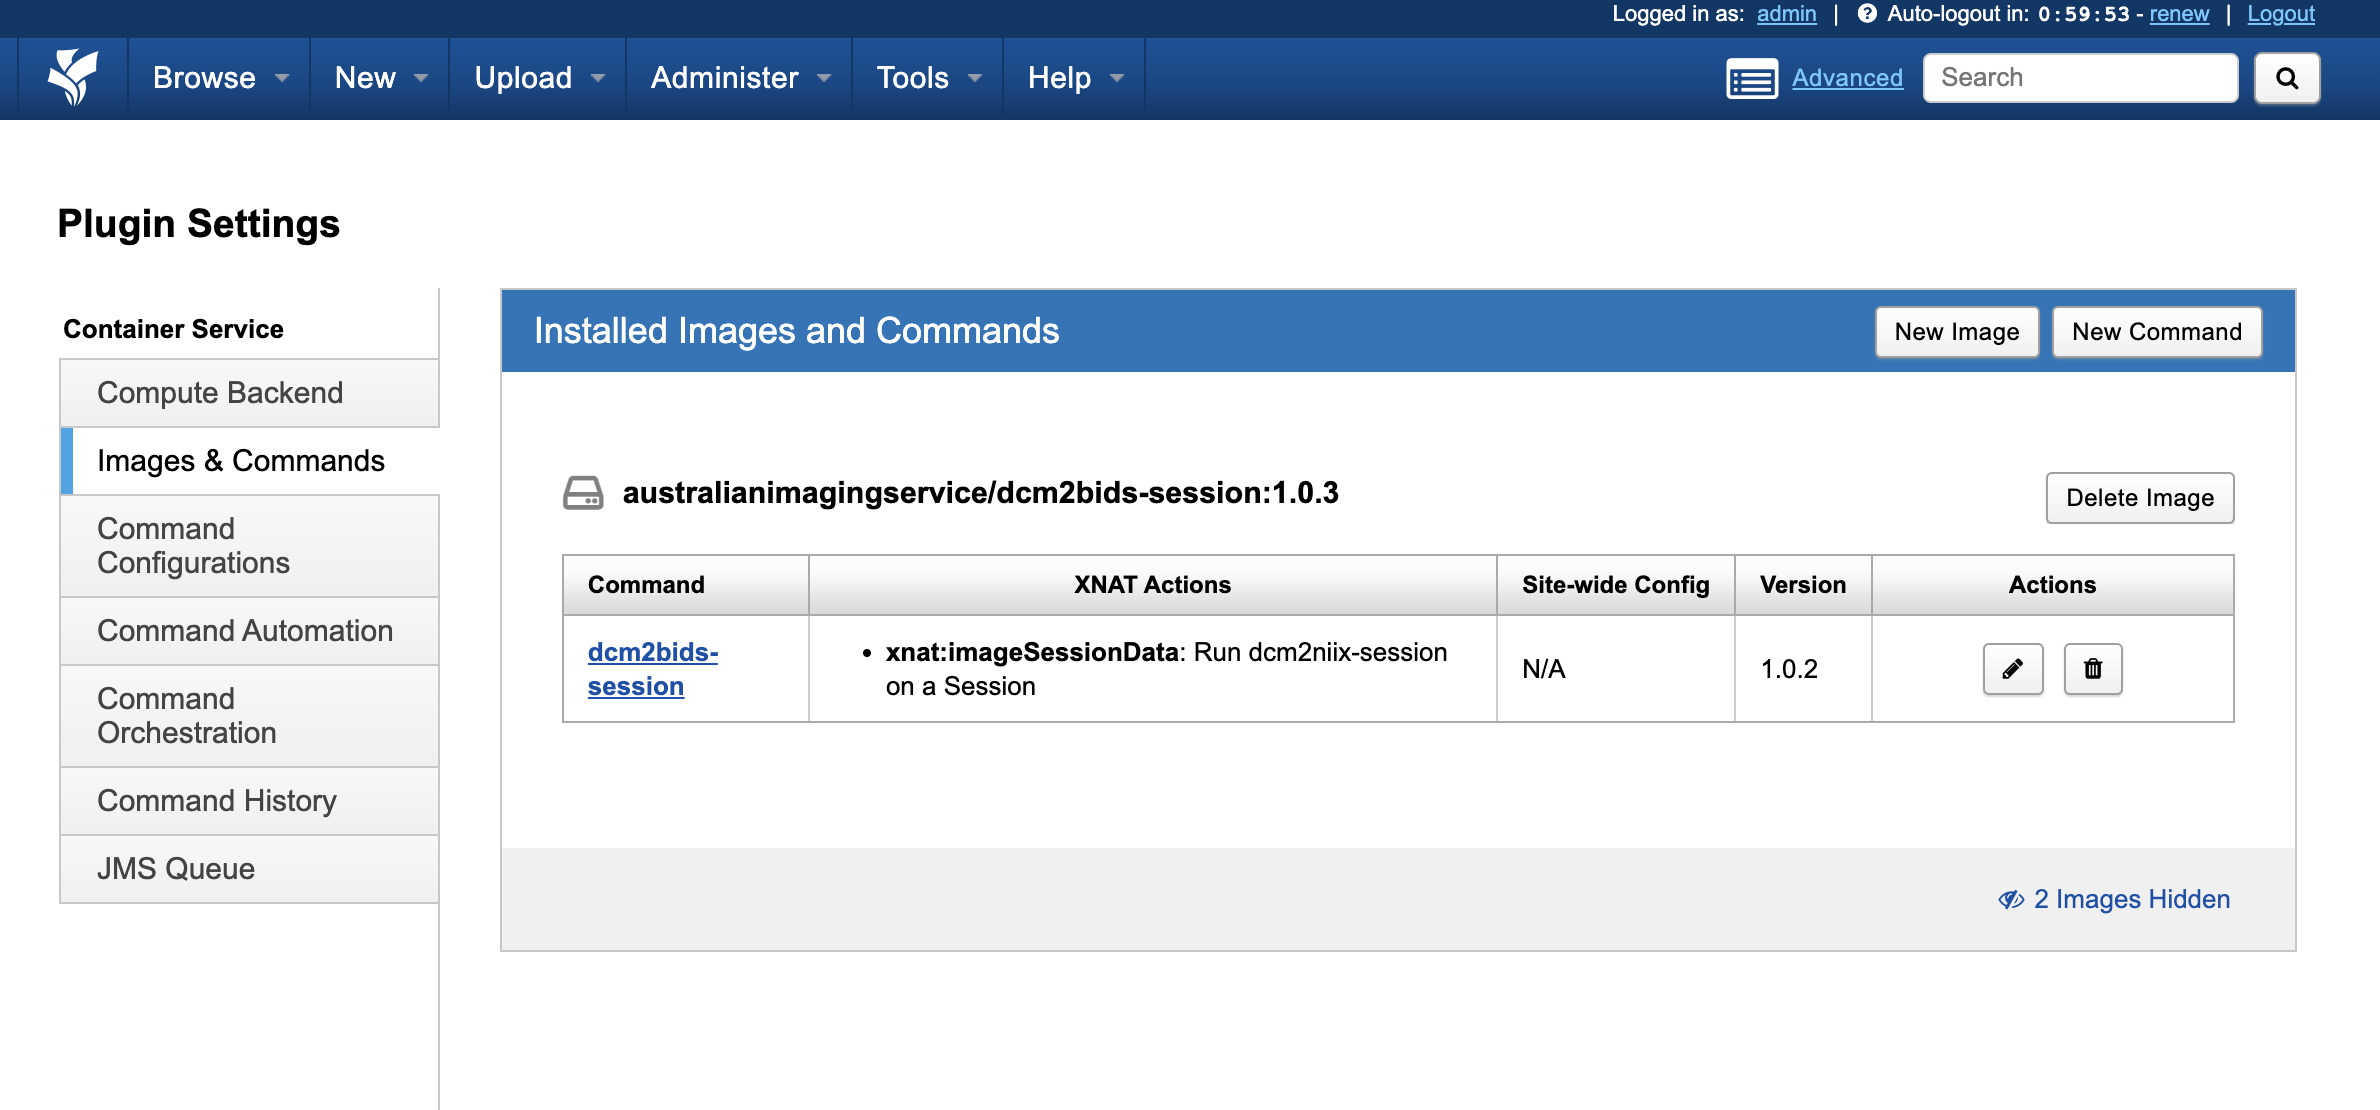
And you should see the newly pulled image in the list of images and commands
Enabling the pipeline command
Site-wide
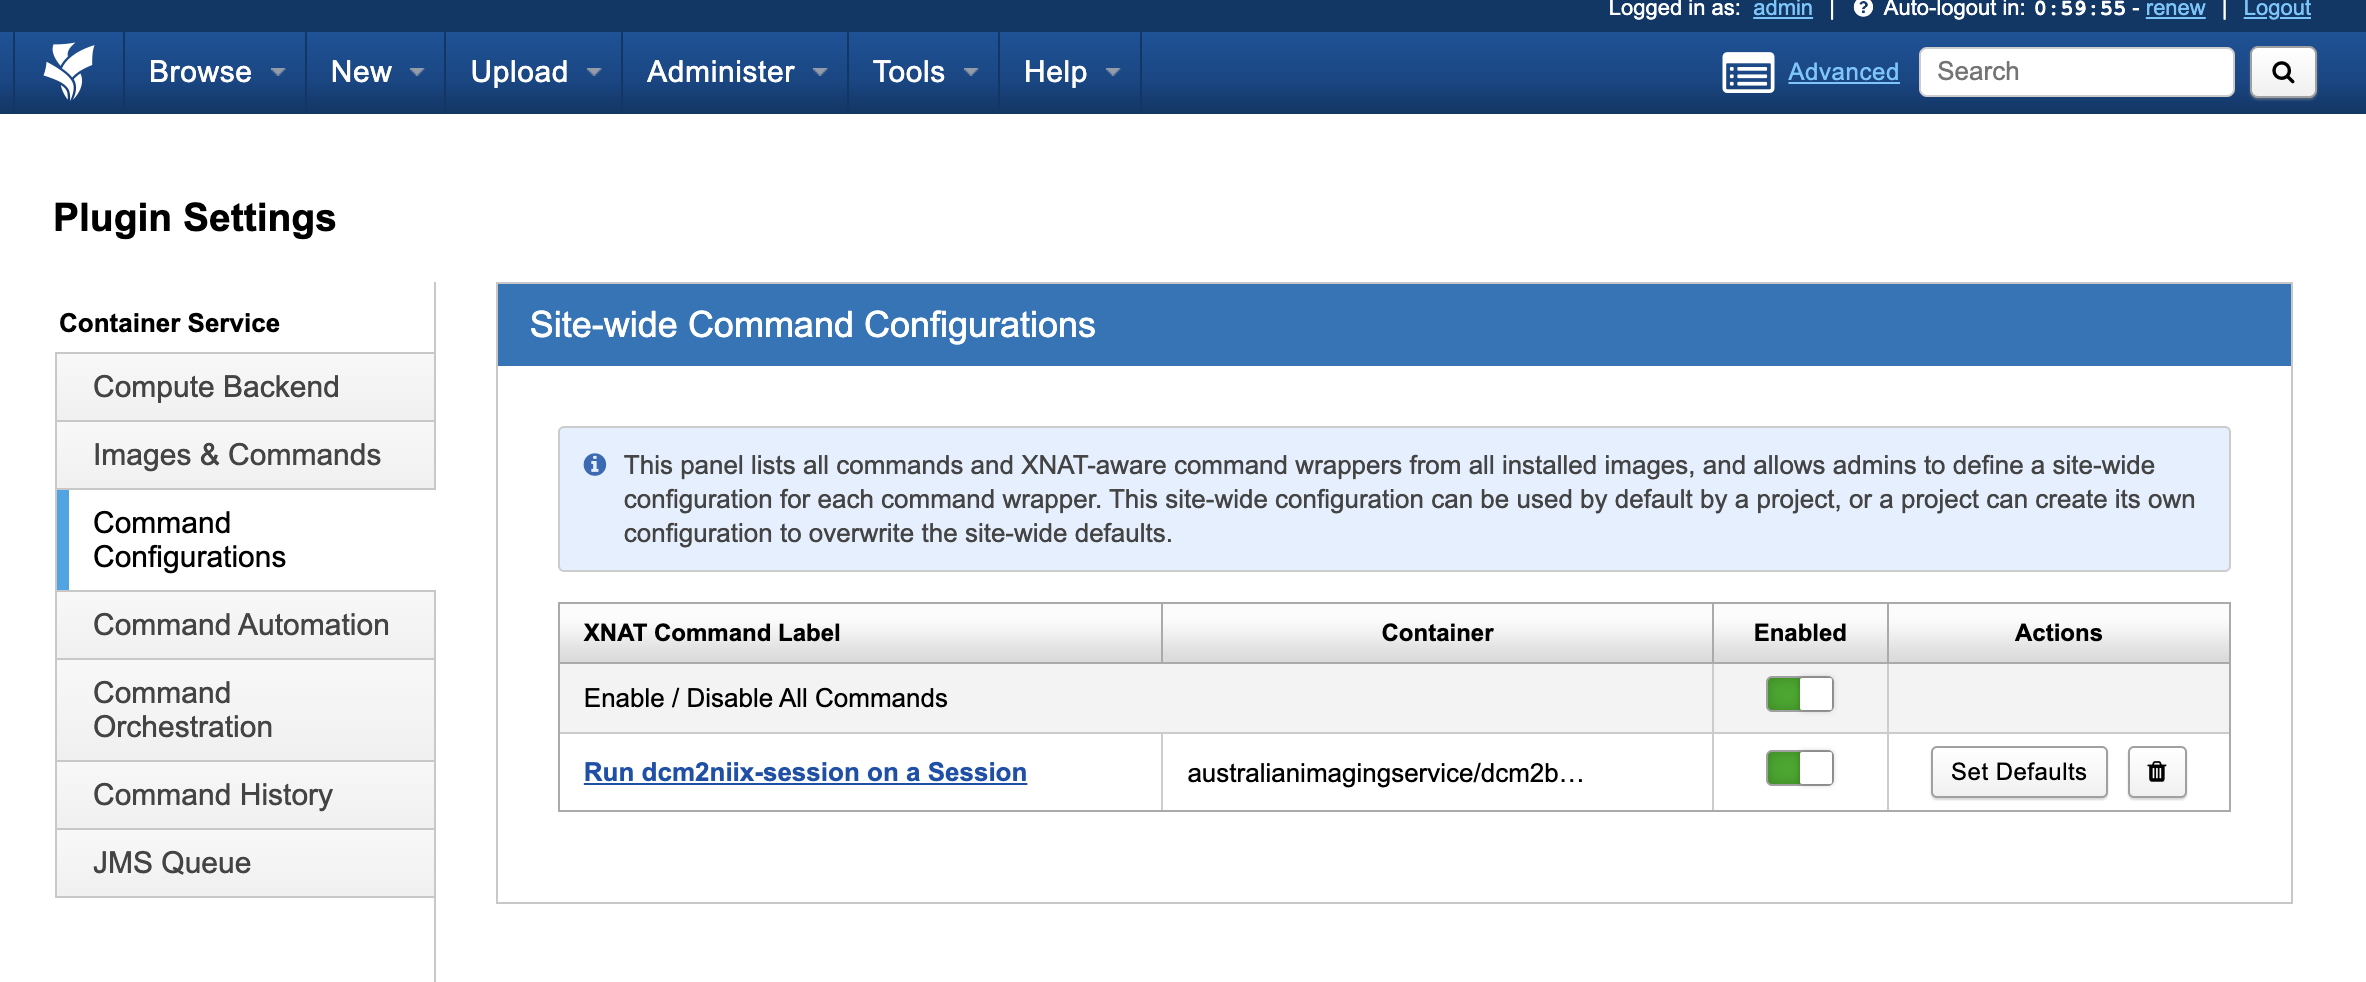
After the pipeline image is installed, the pipeline needs to be enabled
before it is ready to be used. This is first done by the systems administrator in the Commands and Configurations item of the plugin
settings menu
Per-project
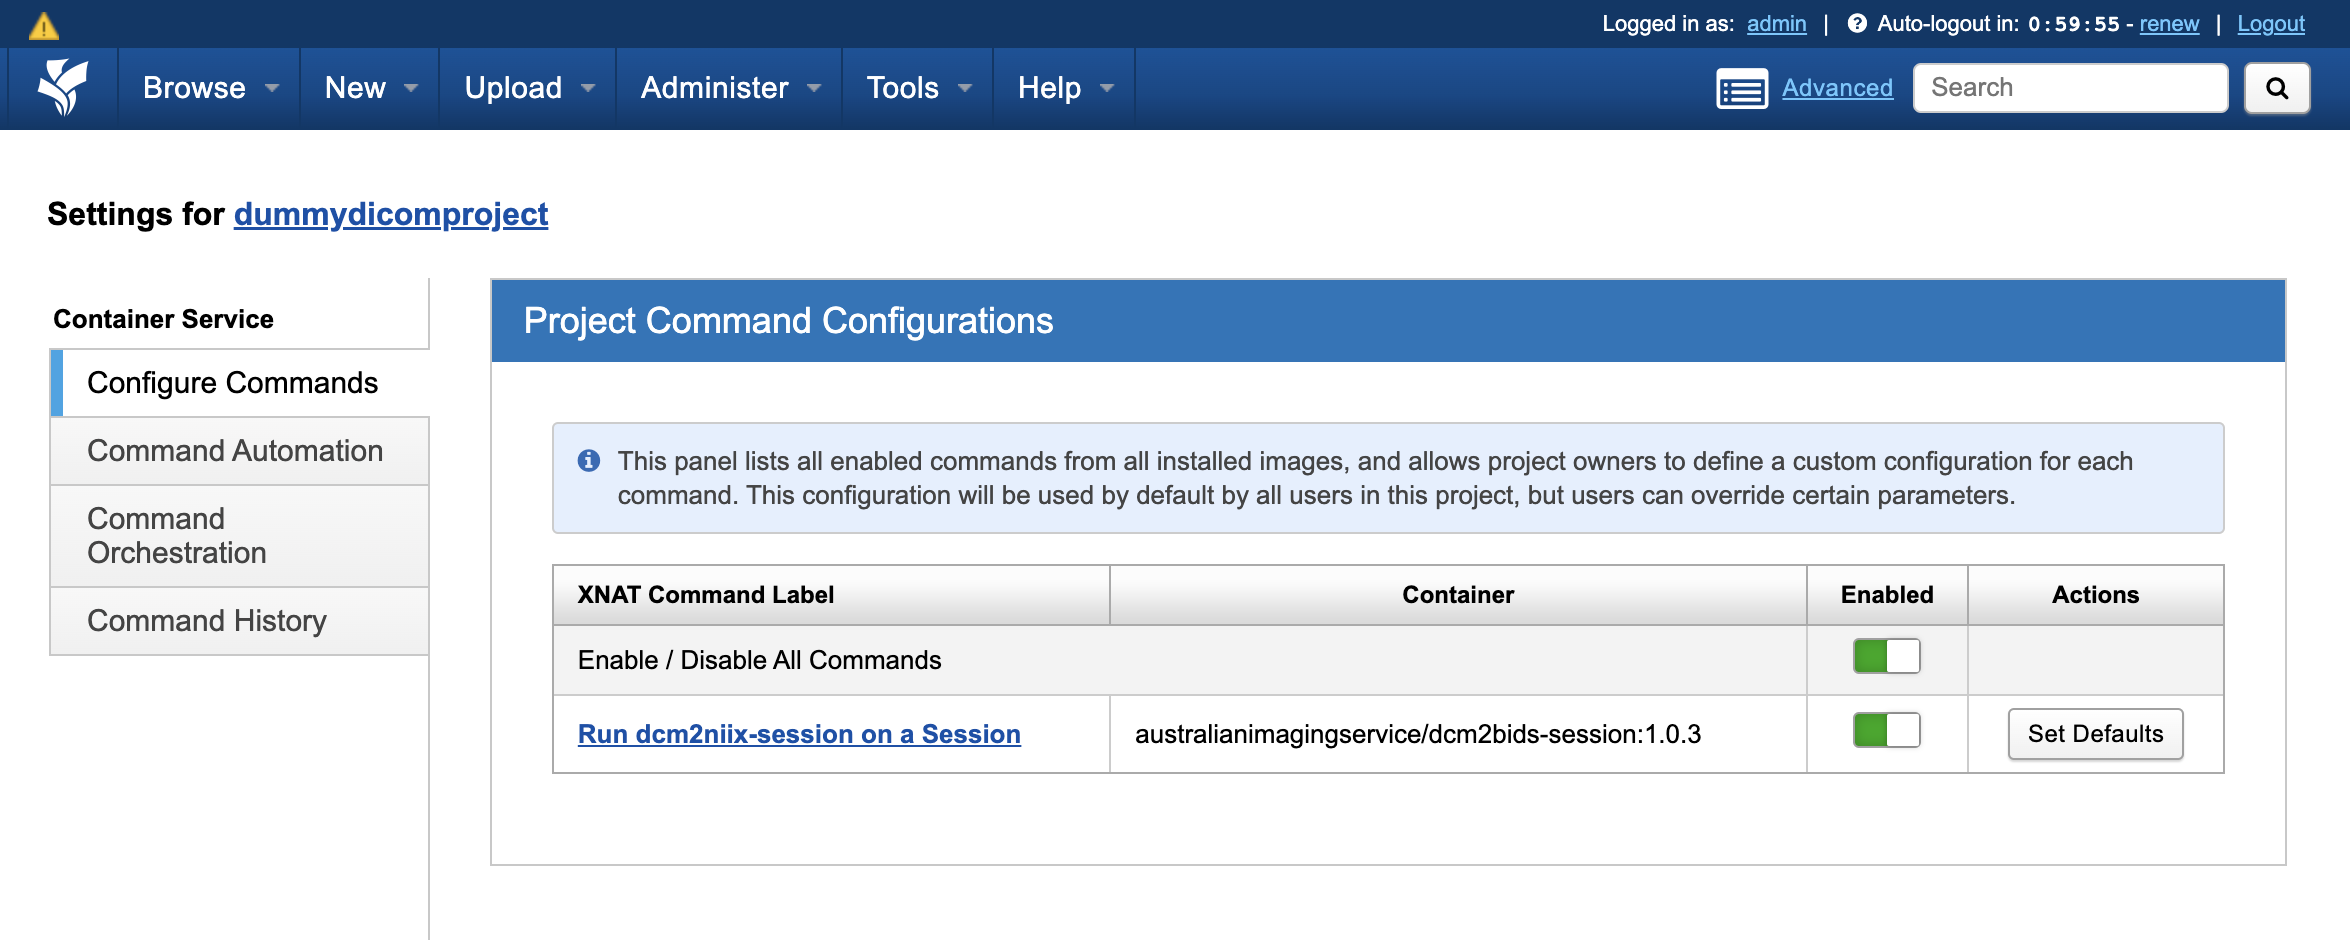
Next the pipeline needs to be enabled for the project you want to run it on. This is typically performed by the CI/data-manager on the project. To do this, navigate to the Project Settings on the main
page for the project
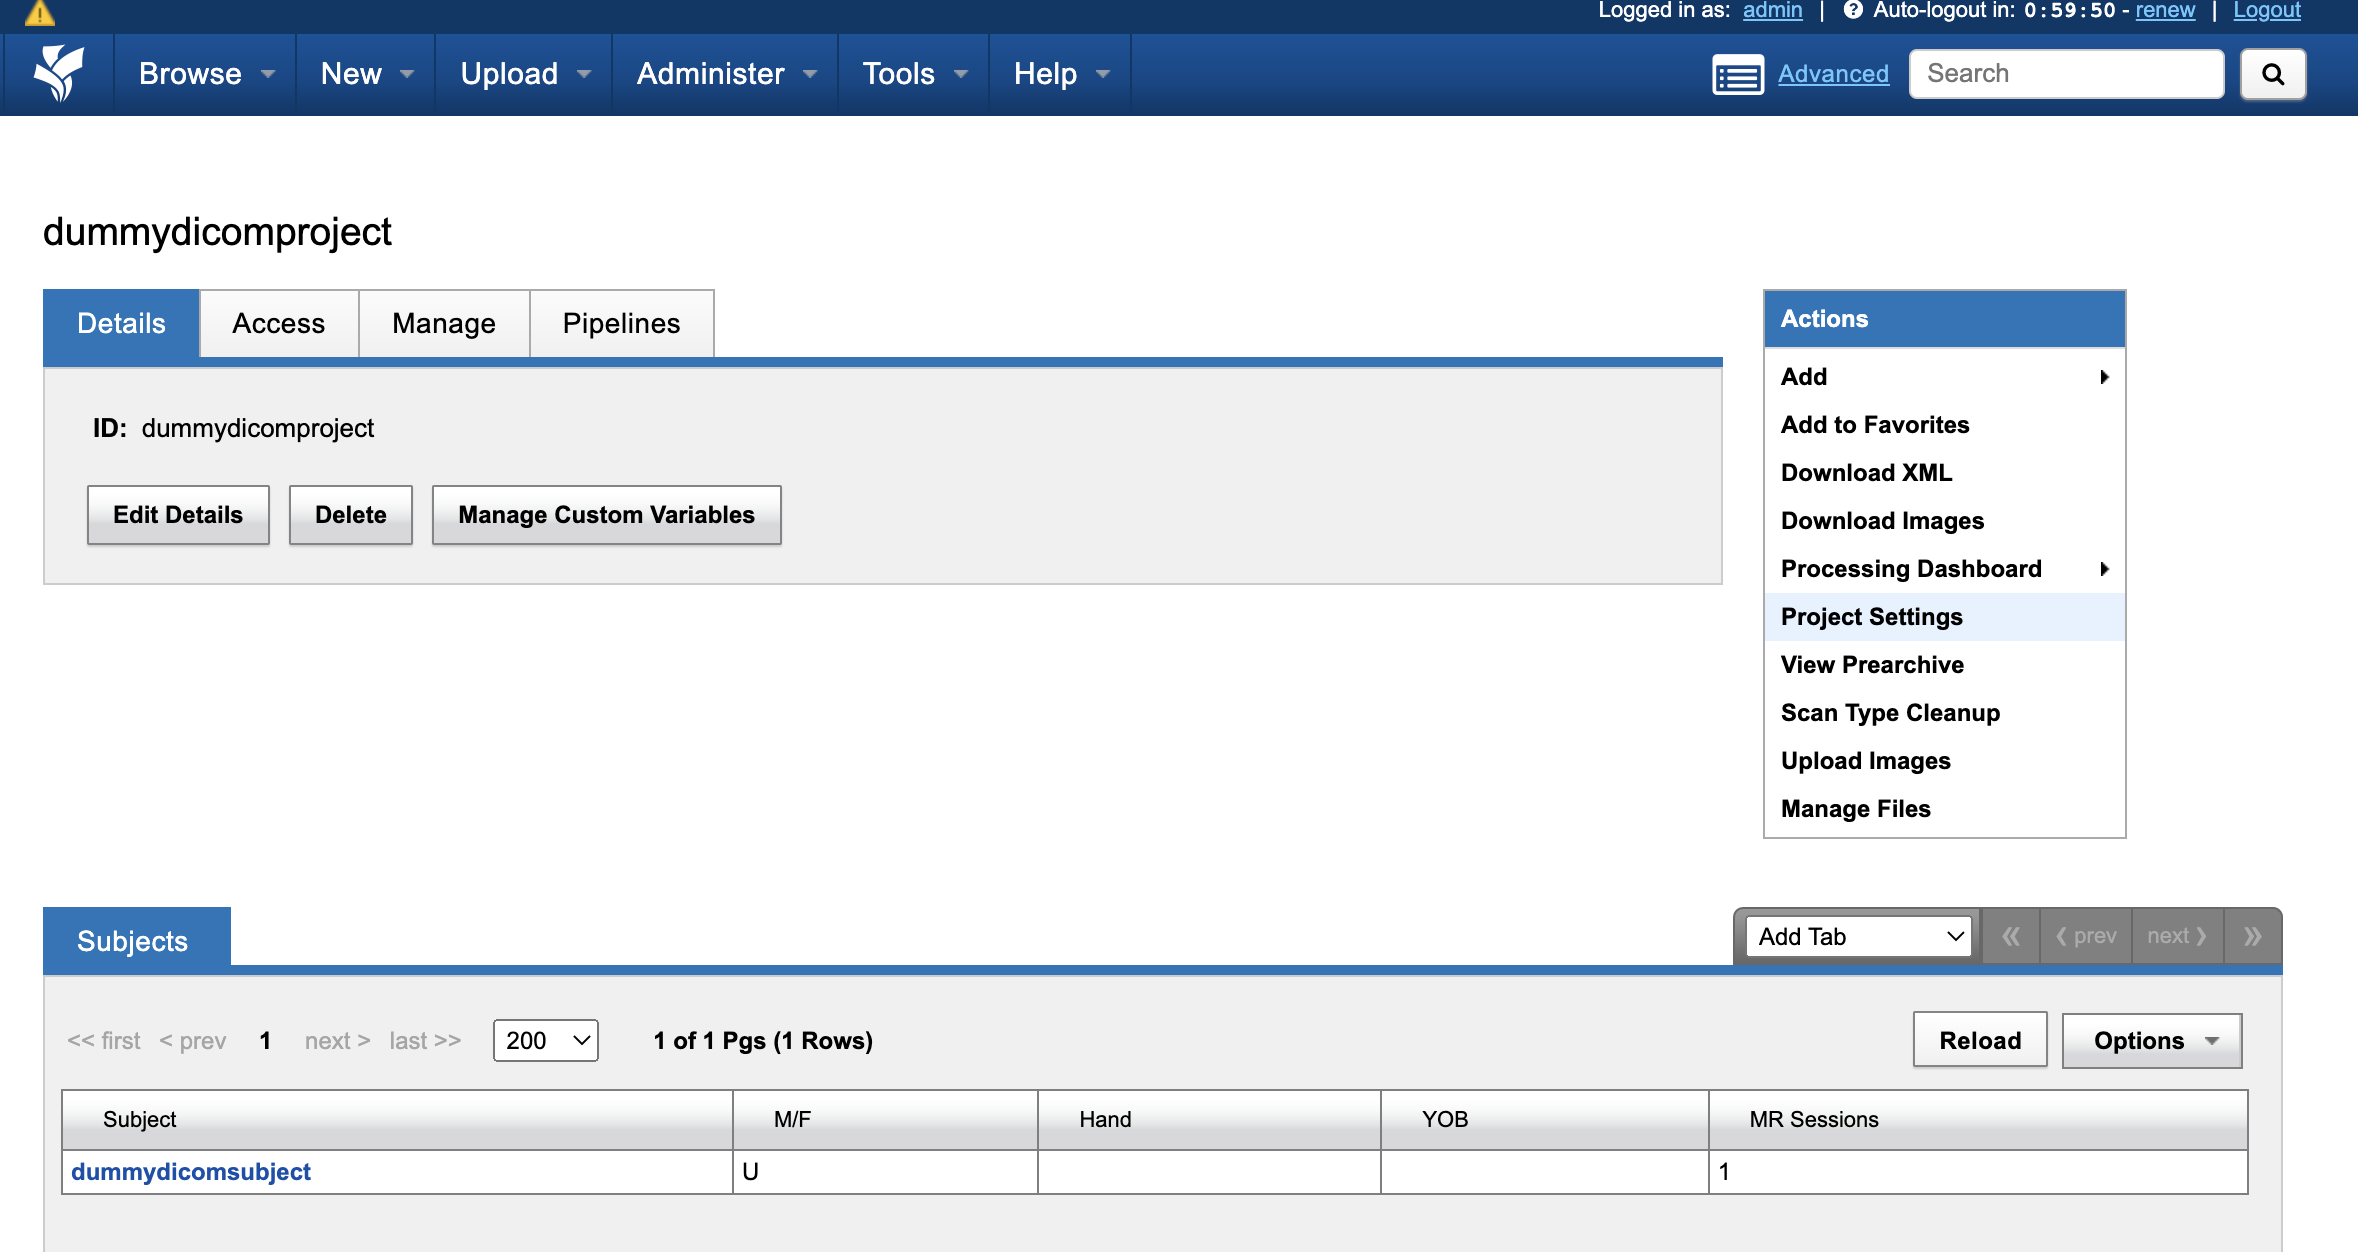
The enable the command you want to use on your project
Running the pipeline
To run the pipeline navigate to the page of the session to run it on.
Note that different pipelines may be configured run against different objects in the XNAT hierarchy (e.g. scan, project) and need to be launched from the corresponding pages.
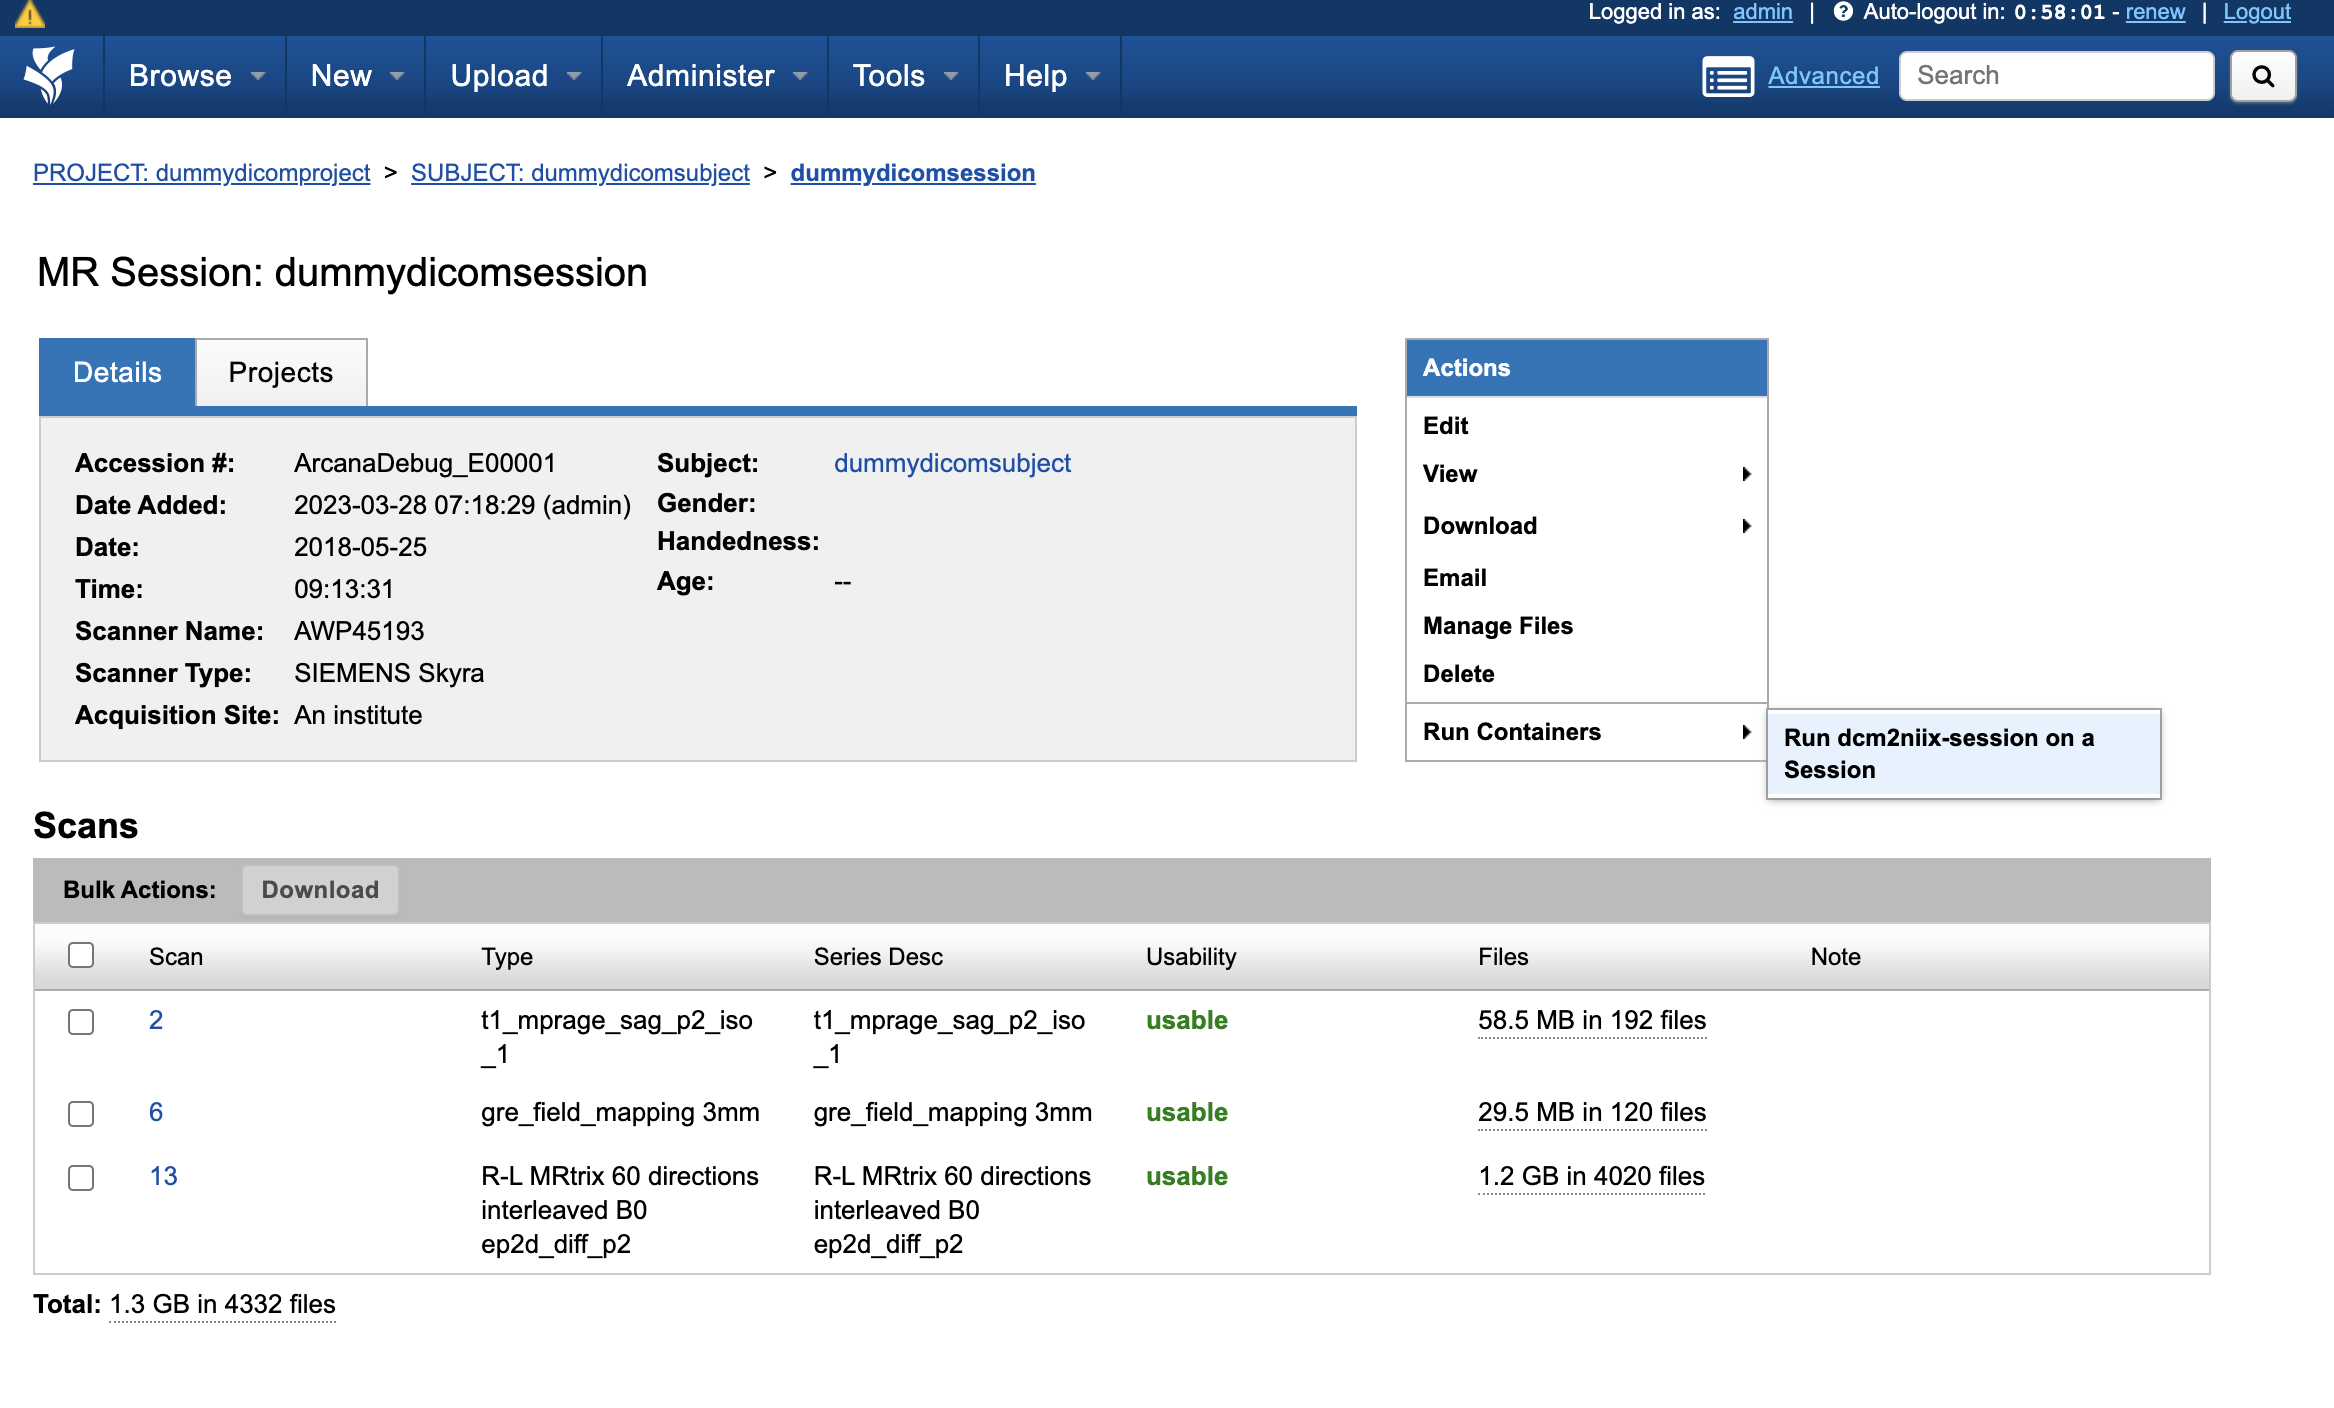
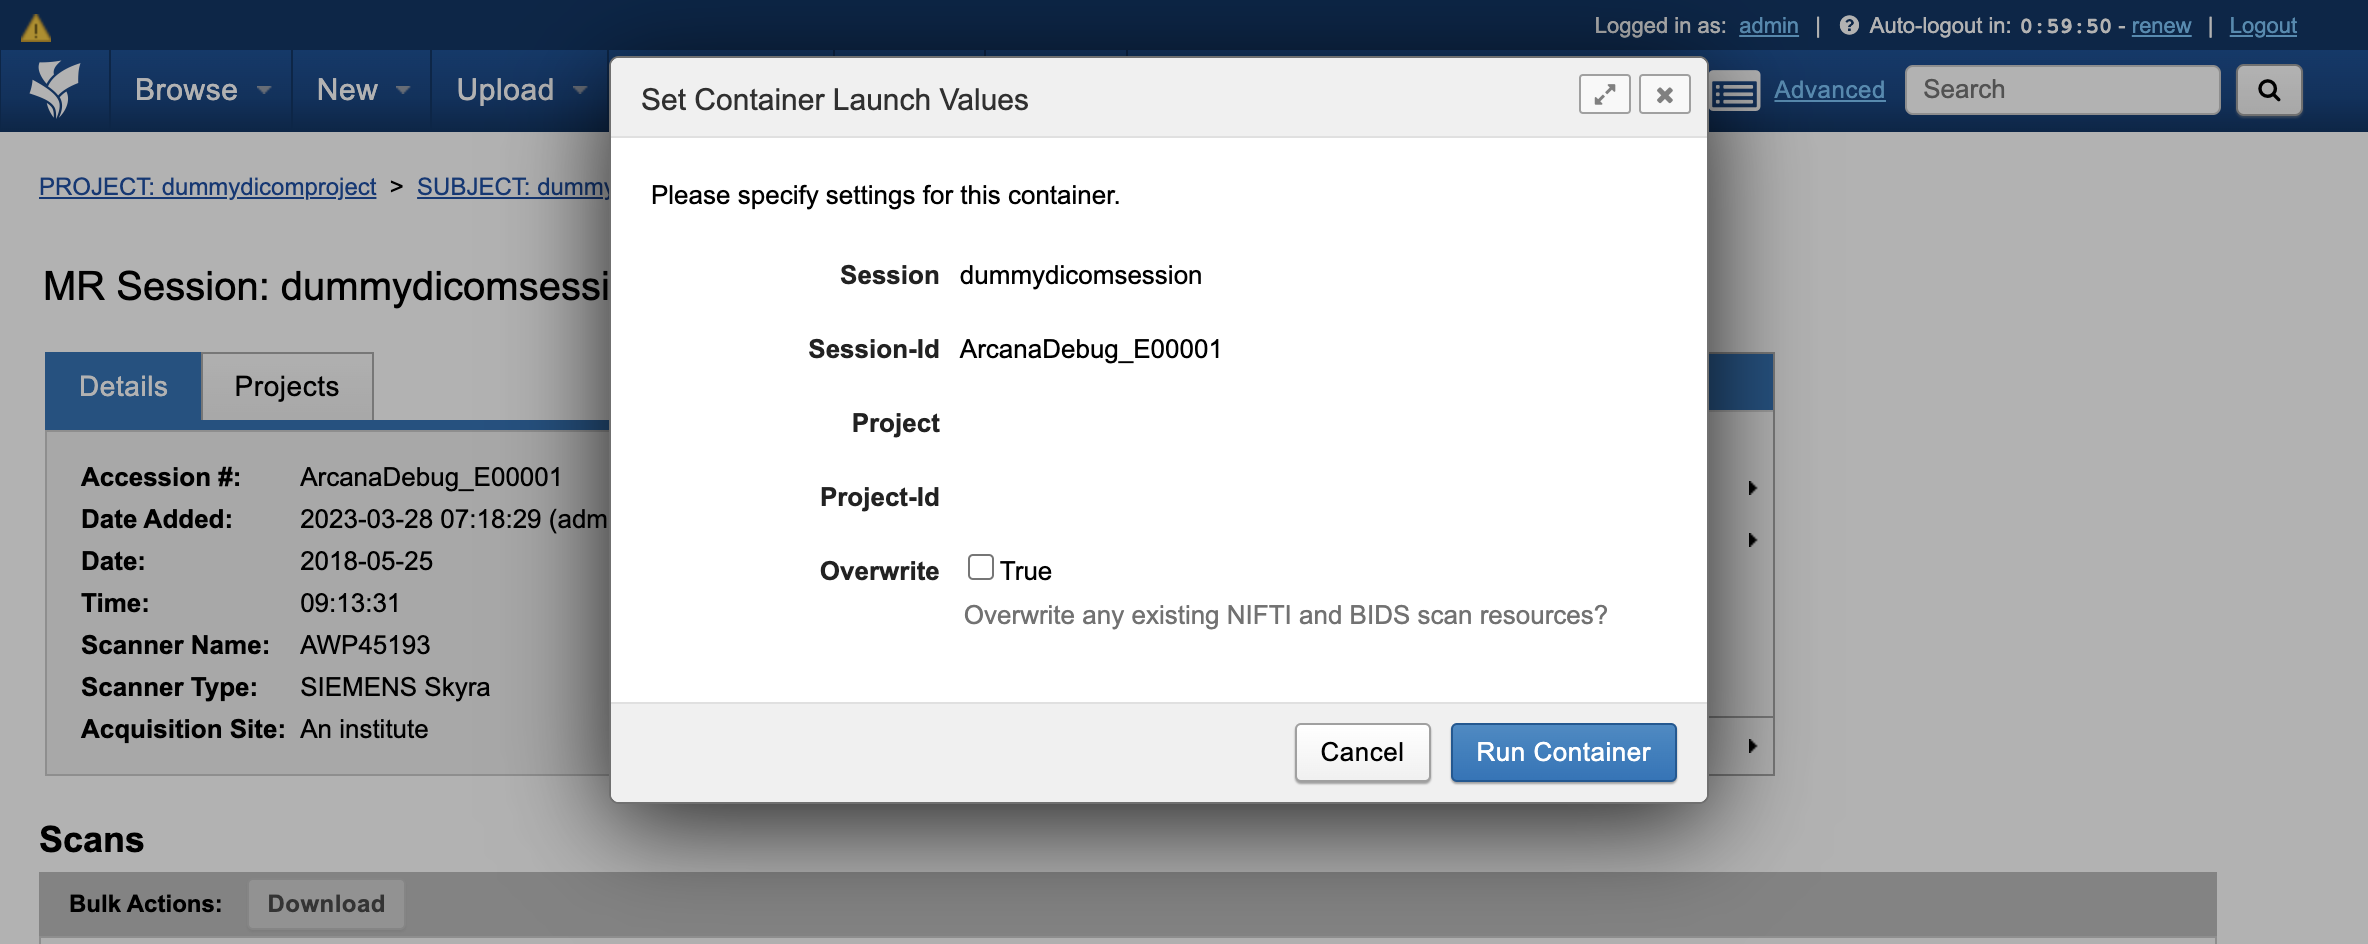
This will bring up the launch window, which will enable you to set any
parameters of the pipeline (e.g. Overwrite in this example)
Checking status of pipeline
To check the status of a launched pipeline, go to the History table and click Reload. There you should see your pipeline, and you can click on the “eye” symbol next to the status to pop up the launch details and view stdout/stderr outputs.
After the pipeline has finished you should be able to find your files in the file manager (i.e. under Manage Files)