Characterisation Virtual Laboratory (CVL)
Access CVL desktops
Have a University of Sydney login
Requirements:
- Ronin Link client installed
To login to Ronin follow the Ronin instructions
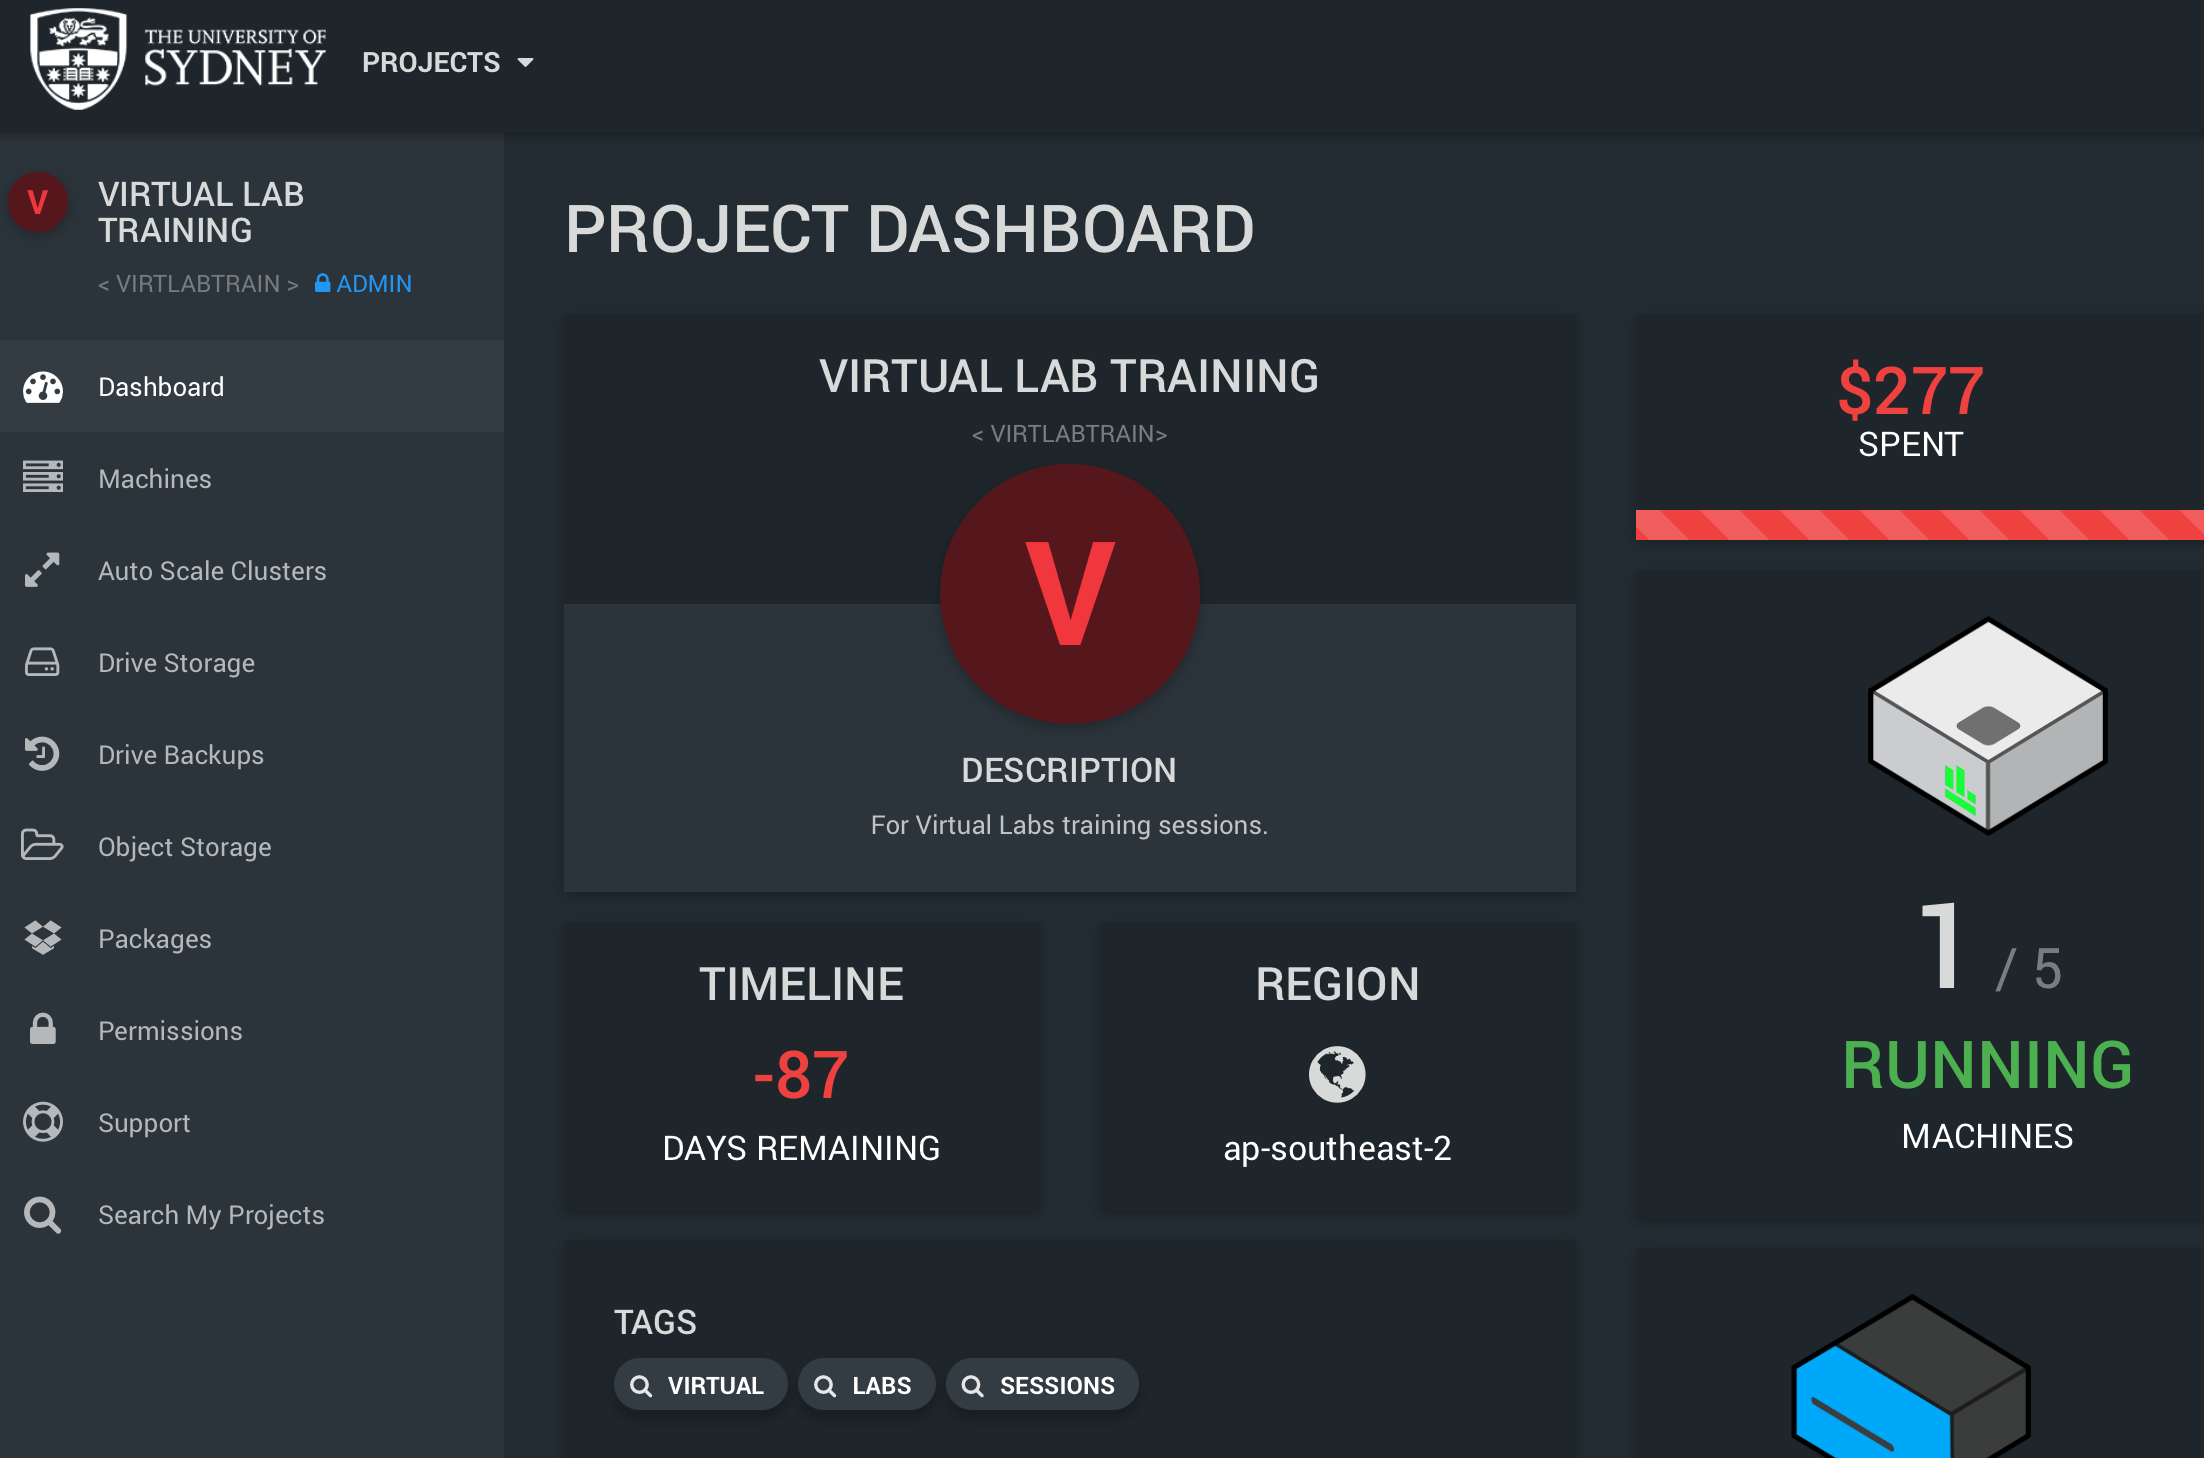
Once logged in select the VIRTLABTRAIN (VIRTUAL LAB TRAINING) project
Create a CVL desktop instance and connect
- From the main Ronin menu select
MachinesandNew Machineto bring you to the Machine composer - From
Step 1 - Softwarescroll down toPre-configured software- Select
CVL Desktop (Focal 20.04) - NB: There is a Jammy 22.04 variant, however this version does not work with the ‘Ronin Link’ client
- Select
- From
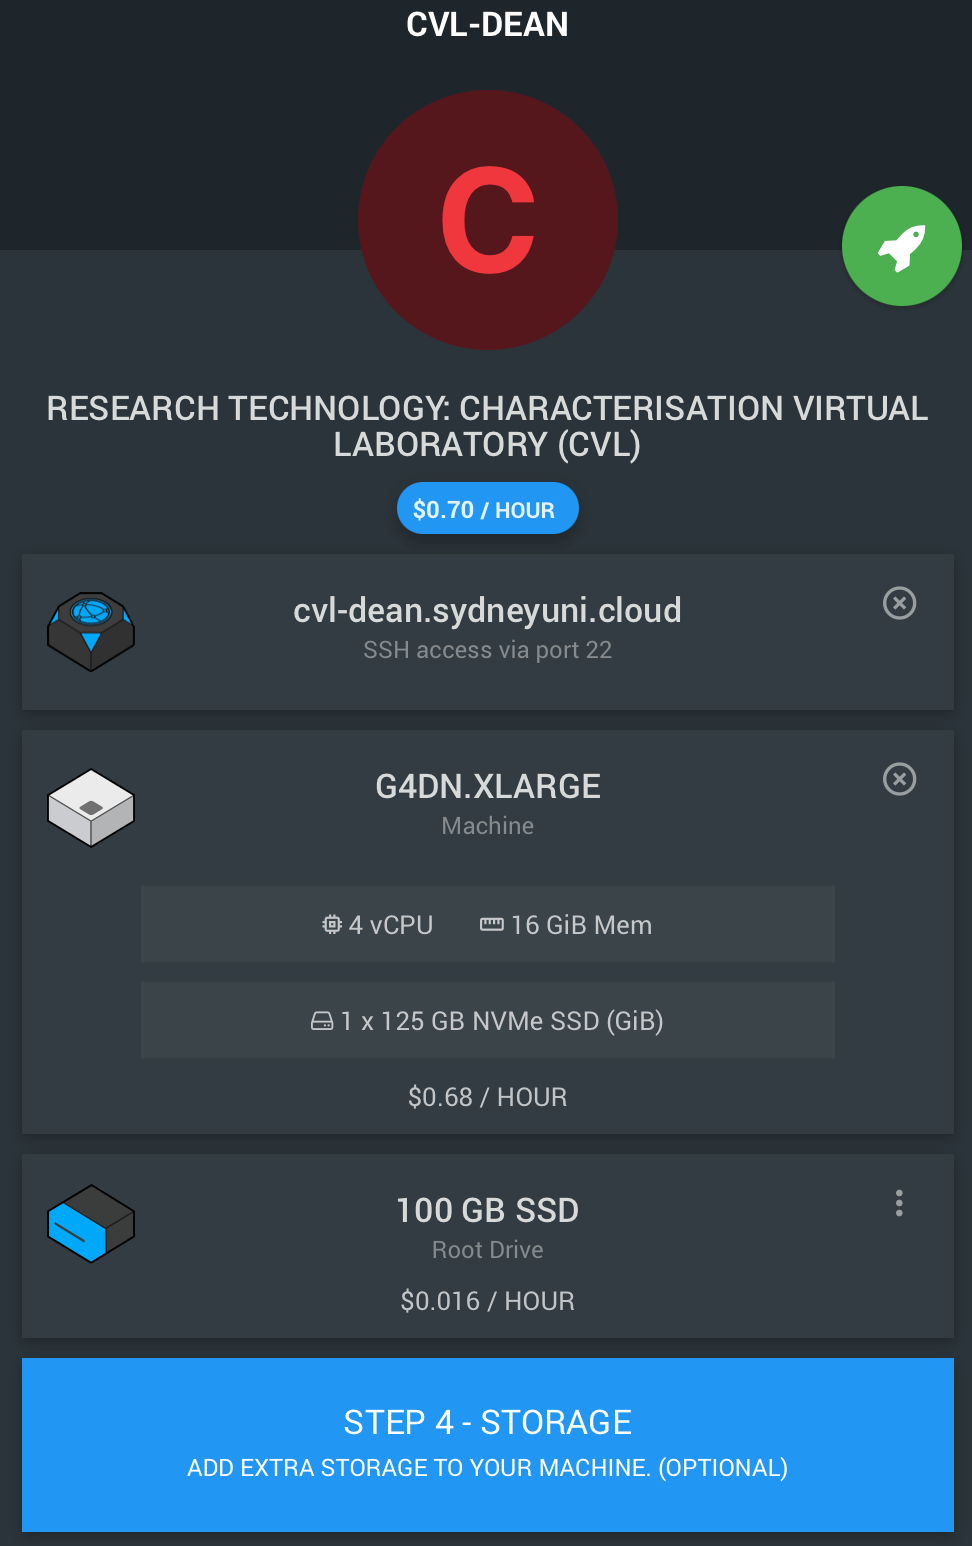
Step 2 - Addresstype in a unique name such ascvl-YOURNAMEthe UI will indicate if the name is available- The FQDN of your machine will be
cvl-YOURNAME.sydneyuni.cloud
- The FQDN of your machine will be
- From
Step 3 - Machine typescroll down toGPU Machinesand expand the menu- Scroll down to
G4DNand selectg4dn.xlarge
- Scroll down to
- From
Step 5 - Storage, this is optional and not required for this training session
On the right of the screen you should see something similar to the image bellow. Once you have reviewed the
instance creation details click on the rocket symbol to continue.
You will then be taken to the Manage your Linux SSH key pop up window.
- Click on the
Create tab, unless you already have created an SSH key - From the
Create tabenter a unique name for your SSH key and click onGenerate a new SSH key- A good practice is to use your email address for the key name e.g., dean.taylor@sydney.edu.au
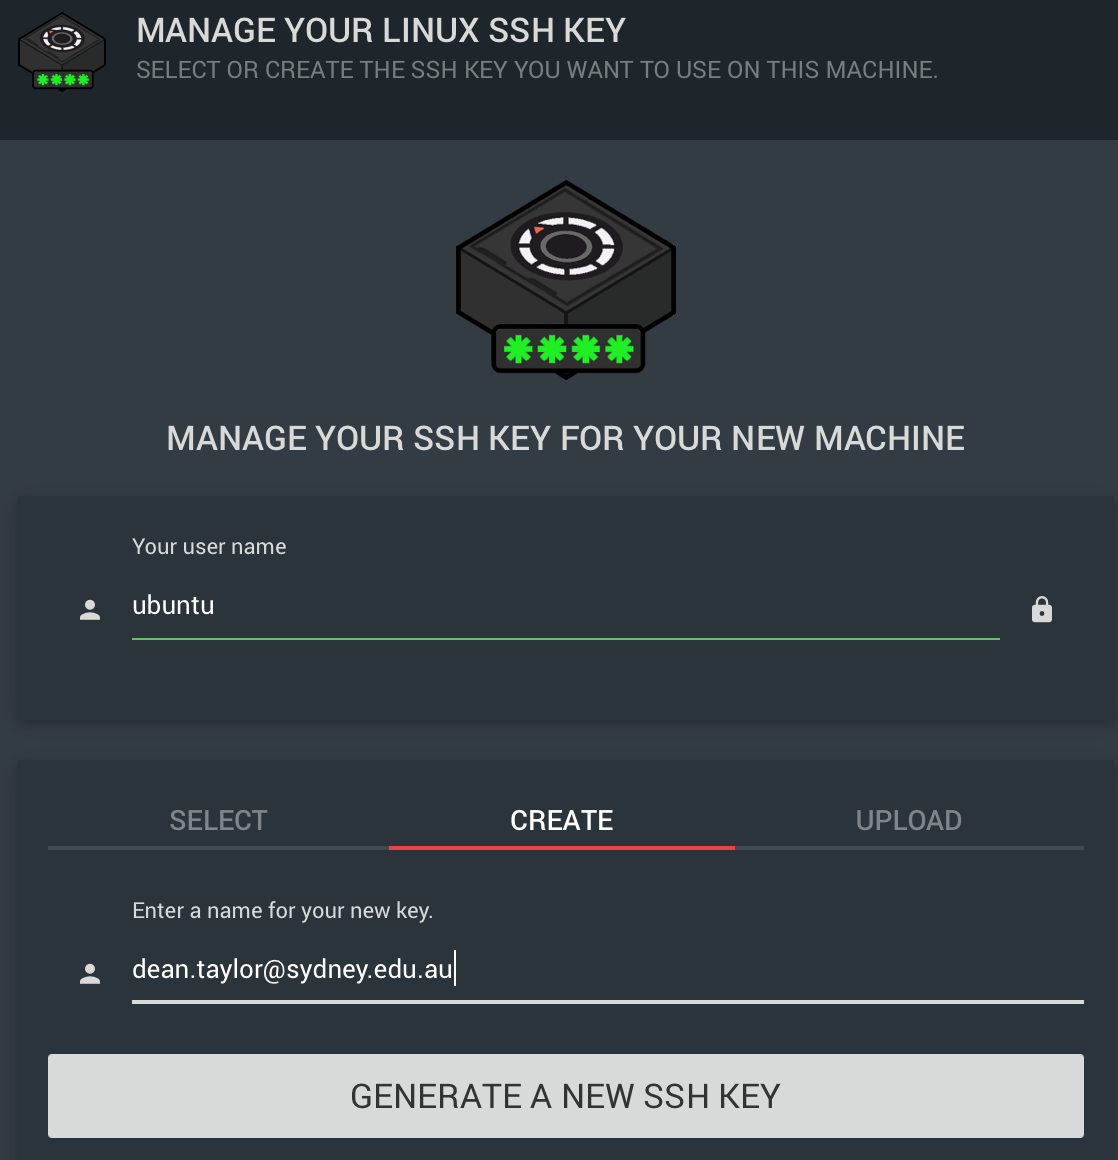
- Click on
Launch my machine

- Feel free to check out the links on this screen and once you are ready to continue, select
Show me my new machine- This will take you to the
Project machinespage - You may need to scroll down, however you should see your machine in the
runningstate
- This will take you to the
Control your VM instance
Under the status line which should have the ‘running’ status showing you can see four tab icons.
- Select each tab icon to get an overview of what each is for. They are reasonably self explanatory.
From left to right
- Information
- Costing overview and options
- VM scheduling
- While in this tab select
Smart schedule - Once you have looked at the available options, select
Stop only enabled, located at bottom - Ensure the VM is powered off by 5pm each day
- Click on
Save changes
- While in this tab select
- Configuration

Open with Ronin Link
Once back on the Project machines screen, you should be looking at your newly created machine.
If you are a Mac M1 or Linux user you will need to create a network route via the AnyConnect VPN to access your machine.
Please review Mac M1 ARM64 and Linux client issues.
If you have added the script to your PATH you can run the following command ronin-client-setup <YOUR-MACHINE-NAME-HERE>.
Click on the Open with Ronin link, if everything goes as expected you should see the Ronin Link application with a reference to your new machine.
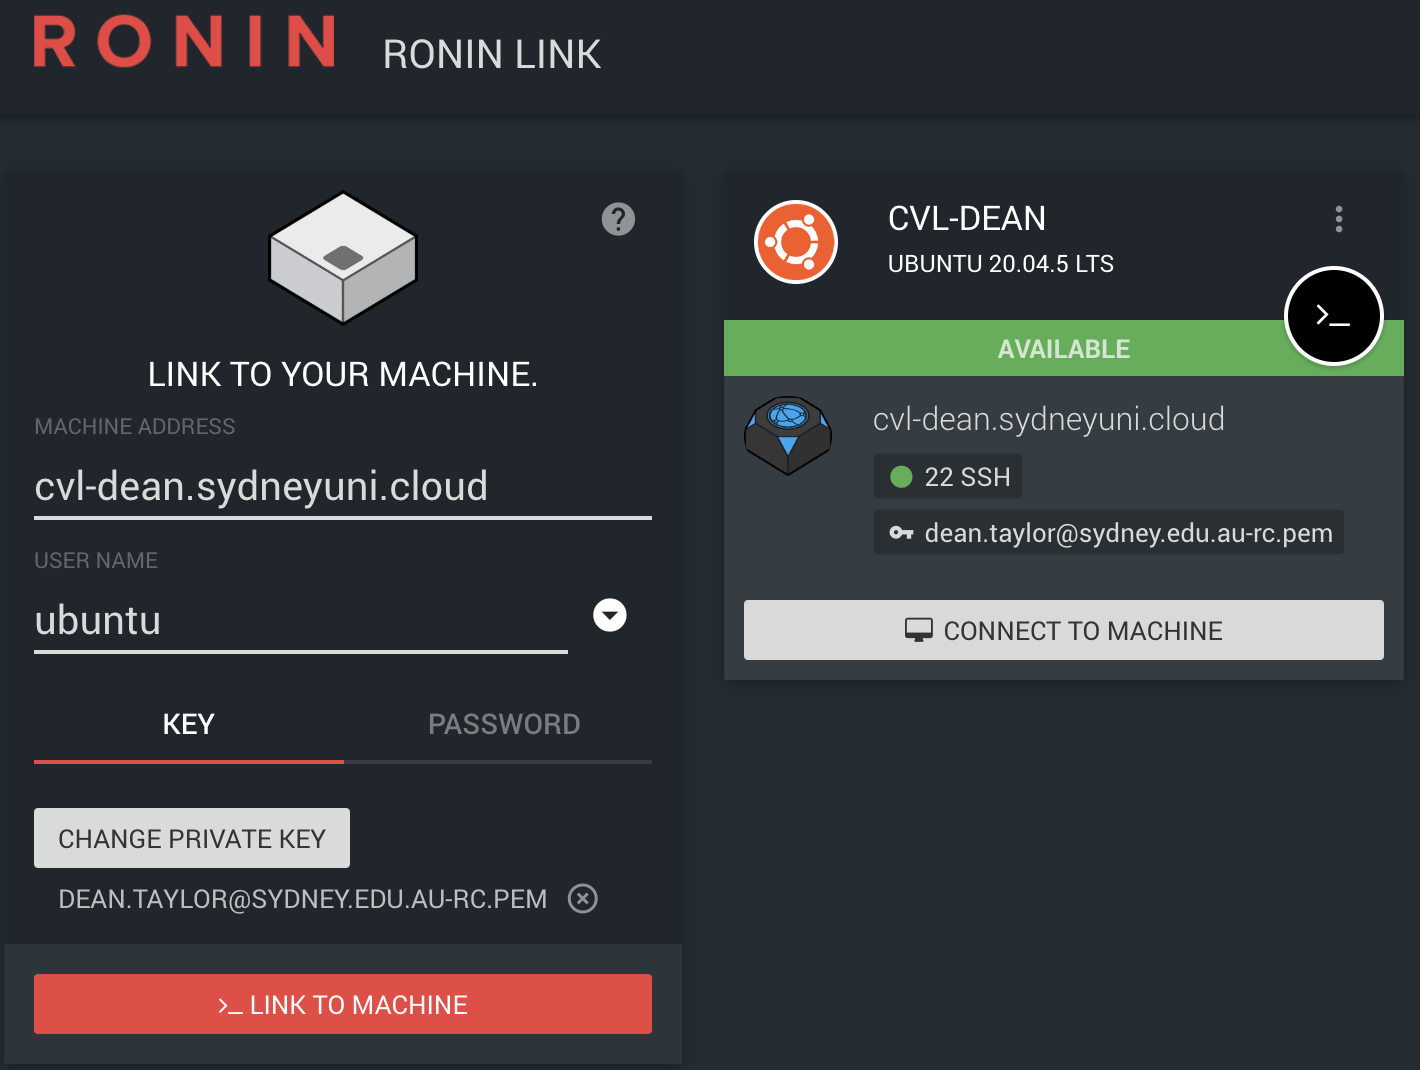
Select Connect to machine and then select Desktop.
You will receive a message to Install DCV. Select Install it!. Please be patient as the software is installed.
NB: While you are waiting you can review the details of the AWS NICE DCV software.
Without a University of Sydney login
Requirements:
- an SSH client
- Windows PC: An SSH client is natively supported on Windows 10 and above.
- Windows remote desktop (RDP) client
- Windows PC: An RDP client is natively supported, see instructions bellow
- Mac: Install the Windows native client via the App Store
- Linux: Remmina is a good RDP client for Linux, however any RDP client should work for this training session
Your instructor will provide you with:
- the fully qualified domain name (FQDN) or internet protocol (IP) of your CVL desktop virtual machine (VM)
- authentication instructions required to access your assigned desktop
You will be able to follow along with the desktop and practical sections on the VM provided once the short intro to Ronin is complete.
Once you have the External DNS and user credentials of your allocated virtual machine (VM).
Connect to the VM via SSH and tunnel specific ports. These ports will be used during the training session.
# Change this value to your remote machine name or IP
VM_FQDN=ec2-13-238-182-54.ap-southeast-2.compute.amazonaws.com

# Connect to the VM via SSH and tunnel specific ports
# Port 3389 is the Windows Remote Desktop (RDP) port
ssh \
  -Llocalhost:63389:localhost:3389 \
  -Llocalhost:8080:localhost:8080 \
  -Llocalhost:8888:localhost:8888 \
  ubuntu@${VM_FQDN}

# Enter the password provided by your instructor
# NB: You will be required to set your own password
On your remote VM
(umask 0077; mkdir -p ${HOME}/.ssh)
Secure your SSH connection
On you local PC
# If you do not already have an SSH key pair
# Use the command bellow selecting defaults
# Enter a passphrase for your SSH private key
ssh-keygen -t ed25519

# Copy your public SSH key to the remote host
scp ${HOME}/.ssh/id_ed25519.pub ${VM_FQDN}:.ssh/
Once connected via SSH to your VM instance you should ensure that the setup process has completed before continuing.
cloud-init status --wait

# Once you have your public key in place and tested that you can log in without a password
# Disable password login via SSH
sudo sshd-harden

# Start a terminal multiplexer (tmux) to protect from accidental disconnections
tmux
Remote Desktop Connection (RDP)
NB: The SSH connection must be active to provide the VPN tunnel for this section. RDP sessions are not recommended over the Internet.
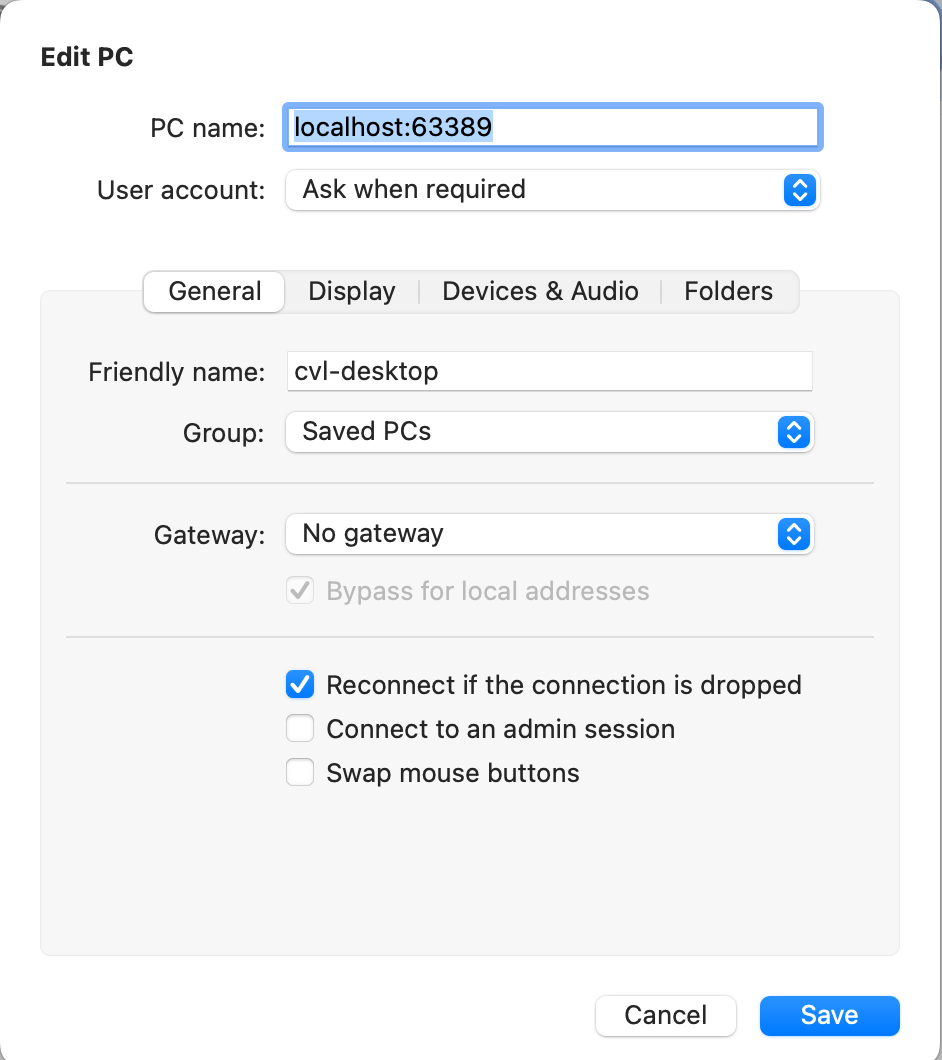
On your local Windows PC: In the search box on the taskbar, type Remote Desktop Connection, and then select Remote Desktop Connection. In Remote Desktop Connection, type localhost:63389, and then select Connect.
Log into the CVL Desktop VM with the user name ubuntu and the password you set in the previous step.